
How to Set up SPF and DKIM with Postfix on Ubuntu Server?

Published on 2019-08-29· Updated on 2021-12-15
The author voluntarily contributed this tutorial as a part of Pepipost Write to Contribute program.
Introduction
In the earlier tutorials, you learned how to install and configure Postfix. But, despite doing the correct setup of Postfix and having correct MX, A and PTR record your emails might be getting flagged as spam by few of the major ISPs like Gmail, Outlook. So, in this tutorial, you will learn how to further improve email delivery to the recipient's inbox by setting up SPF and DKIM on your server.
What are these SPF and DKIM records all about?
SPF (Sender Policy Framework) is a simple email validation system designed to detect email spoofing. It is an authentication protocol which, when used allows senders to specify which IP addresses are authorized to send emails on behalf of a particular domain. To ensure that your customers and brand are protected from phishing and spoofing attacks, you need to authenticate your email with an SPF record.
DKIM is the acronym for DomainKeys Identified Mail. It is an authentication protocol used to validate sending domain names with email messages. DKIM uses cryptographic authentication by inserting a digital signature into the email message header which is later verified by the receiving host to validate the authenticity of the sender's domain. The DKIM digital signature is created using a unique string of characters encrypted as the public key and stored in your DNS. When a recipient gets your email signed by DKIM, the public key is retrieved from the DNS Records of the sender and is decrypted to authenticate the sender's domain.
Setup SPF Record
Step 1: Create An SPF Record In DNS Of Your Sender Domain
If you are using example.com as the From/Sender domain in all your emails going through Postfix, then this is the domain for which you have to actually set up the SPF record. And, SPF record can be easily set up by login into your DNS provider, e.g. Godaddy, Namecheap.
Once you are logged in, just create a new TXT record like the one below:
TXT @ v=spf1 mx ~all
Note, there might be a few DNS providers, who will require you to enclose the SPF record with quotes, like the one below:
TXT @ "v=spf1 mx ~all"
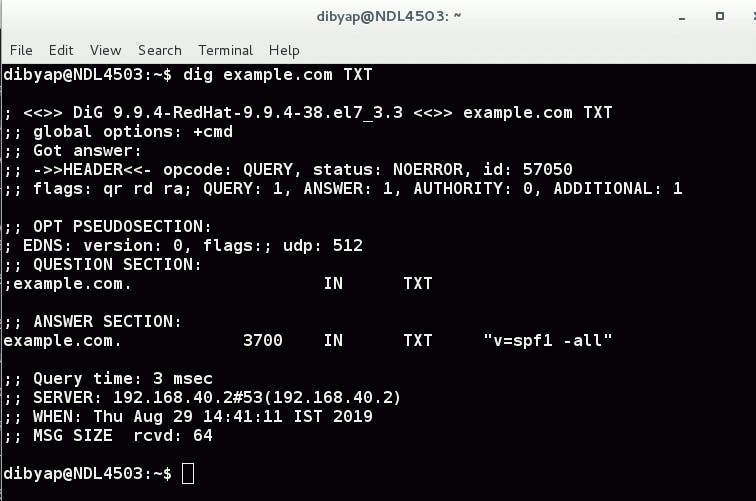
Once you have added the SPF records, it might take up to 24-48 hrs to propagate globally over the internet. You can use the dig command to see the current SPF record which is updated globally:
dig example.com TXT
Or you can also use online SPF validators like mxtoolbox.com, Kitterman.com or spf.myisp.ch
Out of the above online SPF validators, spf.myisp.ch is quite useful because it gives a very detailed view of what all servers/IP addresses are allowed to send emails for your domain.
Step 2: Configuring SPF Policy Agent On Server
By setting up the SPF record for your domain, you have completed a very important step to improve the delivery of outgoing emails to recipient's inbox. Like the way you did the SPF configuration for outgoing emails, the very same way you should also do the SPF validation for the incoming emails. This will help you to detect the forged incoming emails coming in your network.
First, install the required package for SPF policy agent
sudo apt install postfix-policyd-spf-python
The next step is to edit the postfix's master file master.cf. You can use any of your favourite editor vim or nano to edit the file:
sudo nano /etc/postfix/master.cf
Append the following lines at the EOF. This will tell the postfix to start the SPF policy daemon whenever postfix starts itself.
policyd-spf  unix  -       n       n       -       0       spawn
    user=policyd-spf argv=/usr/bin/policyd-spf
Save and close the file. Next step is to edit the postfix's main configuration file main.cf.
sudo nano /etc/postfix/main.cf
Add the following lines at the end of the file main.cf. Adding these lines means, you are giving the instructions to postfix to check SPF on incoming emails and reject the emails which are unauthorized.
policyd-spf_time_limit = 3600
smtpd_recipient_restrictions =
   permit_mynetworks,
   permit_sasl_authenticated,
   reject_unauth_destination,
   check_policy_service unix:private/policyd-spf
Save and close the file. You are now done with the SPF setup, just restart the postfix to reflect the changes.
sudo service postfix restart
or
sudo systemctl restart postfix
How to see whether the emails which you sent to Gmail are SPF passed?
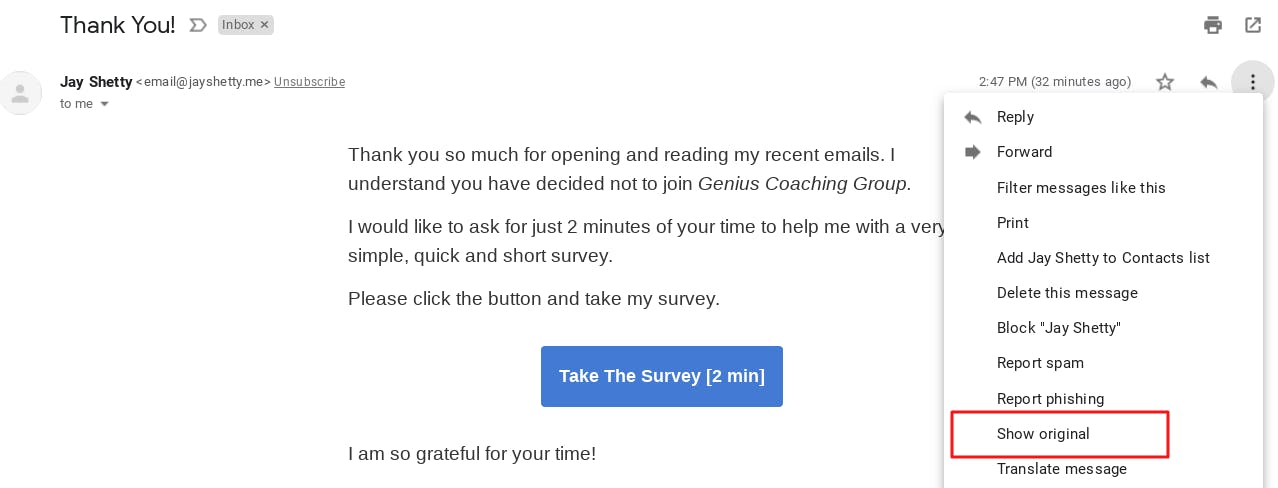
Open any of the email sent via your postfix to Gmail and click on Show original link as shown below:
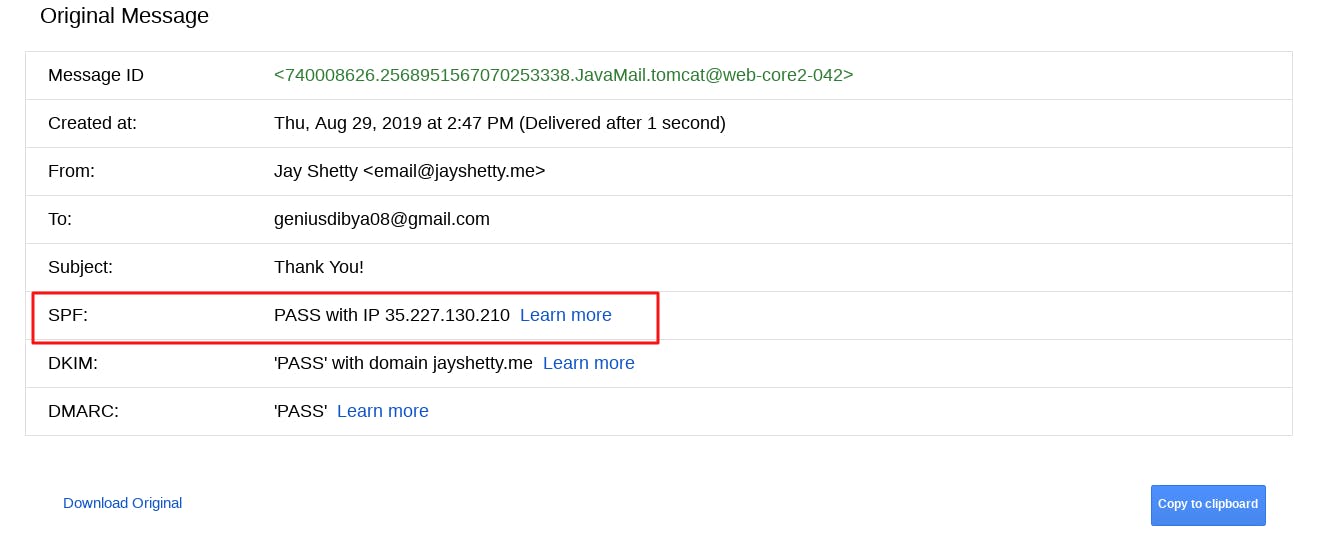
Next, you will see a window like the one below, where you will see the status of SPF (whether Pass or Fail) in Gmail.
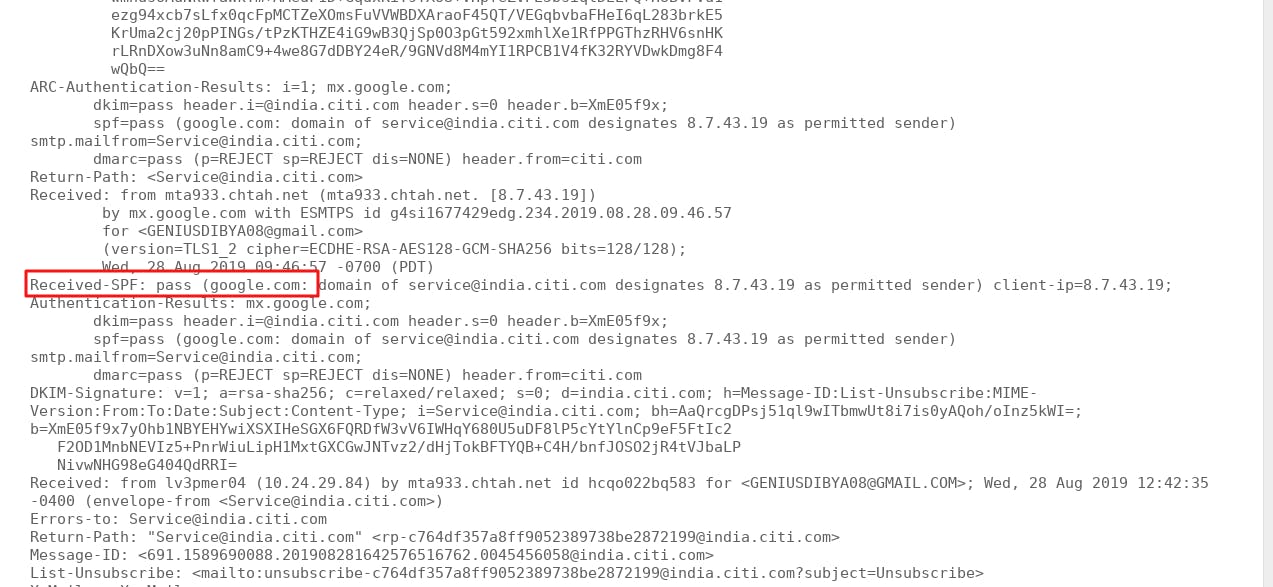
If you see the below line, then this means SPF is pass:
Received-SPF: Pass (sender SPF authorized)
Setting up DKIM
DKIM can be set up by installing OpenDKIM- an open-source package for setting up DKIM.
sudo apt install opendkim opendkim-tools
Once the installation is successful, you need to add postfix user to opendkim group. By doing this, you are actually linking DKIM with your Postfix installation:
sudo gpasswd -a postfix opendkim
Next step is to edit the main configuration file of the OpenDKIM:
sudo nano /etc/opendkim.conf
Change the below-highlighted content in the main configuration:
# This is a basic configuration that can easily be adapted to suit a standard
# installation. For more advanced options, see opendkim.conf(5) and/or
# /usr/share/doc/opendkim/examples/opendkim.conf.sample.

# Log to syslog
Syslog          yes
# Required to use local socket with MTAs that access the socket as a non-
# privileged user (e.g. Postfix)
UMask           002

# Sign for example.com with key in /etc/mail/dkim.key using
# selector '2007' (e.g. 2007._domainkey.example.com)
#Domain         example.com
#KeyFile        /etc/mail/dkim.key
#Selector       2007

# Commonly-used options; the commented-out versions show the defaults.
Canonicalization  relaxed/simple
Mode            sv
SubDomains      no
#ADSPAction             continue
AutoRestart       yes
AutoRestartRate         10/1M
Background          yes
DNSTimeout          5
SignatureAlgorithm      rsa-sha256

# Always oversign From (sign using actual From and a null From to prevent
# malicious signatures header fields (From and/or others) between the signer
# and the verifier.  From is oversigned by default in the Debian pacakge
# because it is often the identity key used by reputation systems and thus
# somewhat security sensitive.
OversignHeaders     From

# List domains to use for RFC 6541 DKIM Authorized Third-Party Signatures
# (ATPS) (experimental)

#ATPSDomains        example.com

#OpenDKIM user
# Remember to add user postfix to group opendkim
UserID                 opendkim

# Map domains in From addresses to keys used to sign messages
KeyTable            refile:/etc/opendkim/key.table
SigningTable        refile:/etc/opendkim/signing.table

# Hosts to ignore when verifying signatures
ExternalIgnoreList  /etc/opendkim/trusted.hosts

# A set of internal hosts whose mail should be signed
InternalHosts /etc/opendkim/trusted.hosts
Once changes are done, save and close the file.
Create Signing Table
In order to create the signing table, you need to first create a directory structure for OpenDKIM. Execute the following commands to configure the same:
sudo mkdir /etc/opendkim
sudo mkdir /etc/opendkim/keys
Change the permission and role:
sudo chown -R opendkim:opendkim /etc/opendkim
sudo chmod go-rw /etc/opendkim/keys
Execute the following command to create the signing table:
sudo nano /etc/opendkim/signing.table
then add the following lines in the above file:
*@your-domain.com default._domainkey.your-domain.com
Save and close the file.
Create Key Table
Execute the following command to create the key table:
sudo nano /etc/opendkim/key.table
Once created, add the following lines in the file:
default._domainkey.your-domain.com your-domain.com:default:/etc/opendkim/keys/your-domain.com/default.private
Save and close the file.
Create The Trusted Hosts File
Execute the following command to create the trusted table:
sudo nano /etc/opendkim/trusted.hosts
Once created, add the following lines in the file:
127.0.0.1
localhost

*.your-domain.com
Adding the above line means that emails coming from the mentioned IP addresses and domains will be trusted and signed.
Generation of the Private and Public Key for DKIM
DKIM is going to be used for signing outgoing emails. So, you need to generate both private and the public key for DKIM. The private key will be used to signing and the public key which will be published in the DNS will be used for remote verification.
Create a folder for your domain for which DKIM to be signed
sudo mkdir /etc/opendkim/keys/your-domain.com
You can use the opendkim-genkey tool to generate the keys
sudo opendkim-genkey -b 2048 -d your-domain.com -D /etc/opendkim/keys/your-domain.com -s default -v
Once you will execute the above command, two files will get generated:
1. This file will contain your private key.
/etc/opendkim/keys/your-domain.com/default.private
2. This file will contain your public key which you need to add in the DNS record of your domain.
/etc/opendkim/keys/your-domain.com/default.txt
Change the ownership of the private key file:
sudo chown opendkim:opendkim /etc/opendkim/keys/your-domain.com/default.private
Configure Public Key in DNS Record of Domain
Get the public key by doing cat:
sudo cat /etc/opendkim/keys/your-domain.com/default.txt
Copy the record, and log in to your DNS manager e.g. if your DNS is with GoDaddy or Namecheap, then login to their dashboard and add the following DNS record:

Testing Your DKIM Configuration
Execute the following command on your Ubuntu machine to test your keys:
sudo opendkim-testkey -d your-domain.com -s default -vvv
If the setup is correct, you will get the following message:
key OK
Integrate Postfix to OpenDKIM
Postfix can connect with OpenDKIM via Unix socket i.e. /var/run/opendkim/opendkim.sock. But, we need to change the file path because the SMTP daemon which comes with Ubuntu resolves all filenames relative to the Postfix queue directory (/var/spool/postfix).
Create a new directory to keep the OpenDKIM socket file
sudo mkdir /var/spool/postfix/opendkim

sudo chown opendkim:postfix /var/spool/postfix/opendkim
The next step is to edit the socket conf file.
sudo nano /etc/default/opendkim
Search for the following line:
SOCKET="local:/var/run/opendkim/opendkim.sock"
And, replace it with the following:
SOCKET="local:/var/spool/postfix/opendkim/opendkim.sock"
Save and close the file.
Note: You need to do similar changes in the opendkim.conf file too:
sudo nano /etc/opendkim.conf
Search for the following line:
Socket local:/var/run/opendkim/opendkim.sock
And, replace it with the following:
Socket local:/var/spool/postfix/opendkim/opendkim.sock
Next step is to edit the Postfix main configuration file:
sudo nano /etc/postfix/main.cf
Append the following lines after smtpd_recipient_restriction section in the main.cf file.
# Milter configuration
milter_default_action = accept
milter_protocol = 6
smtpd_milters = local:/opendkim/opendkim.sock
non_smtpd_milters = $smtpd_milters
Save and close the file.
You are now all done. Just restart opendkim and postfix service to reflect all the changes.
sudo service opendkim restart
sudo service postfix restart
Now, your Postfix setup is ready with the SPF and DKIM. You can also visit the official Ubuntu community page for additional detailed documentation on SPF and DKIM set up.
Quick Question: Do you know about DMARC policy? It's another crucial component of email authentication.
Keep reading the tutorials and blogs to get deeper into email delivery. Rate us if you loved the article.
Leave comments if you need help.
Grade My Email
Check your spam now?
Netcorecloud's toolkit is the solution to all your email problems.


You can also explore
Netcore connects & unifies your data across all sources, connects to your marketing channels and provides you with control over AI Powered automation and personalization.


Deploy emails that are
screenshot worthy!

Unlock the Secrets of Your Domain, Discover Limitless Possibilities! ✨
Get a Free Domain Health Check Now!

Dibya Sahoo🥑
Co-founder, Pepipost
Over 12 years of experience, building products to deliver emails ~ 🥑 Developer Relations Guy ~ 🎙️ Speaker