
How to Send Email in Android Using JavaMail API

Published on 2019-10-31· Updated on 2021-12-15
The author voluntarily contributed this tutorial as a part of Pepipost Write to Contribute program.
Introduction
A developer who can't get over android and want to send emails using your smartphone? This tutorial talks about how you can send email in android using JavaMail API. Let's begin, shall we!
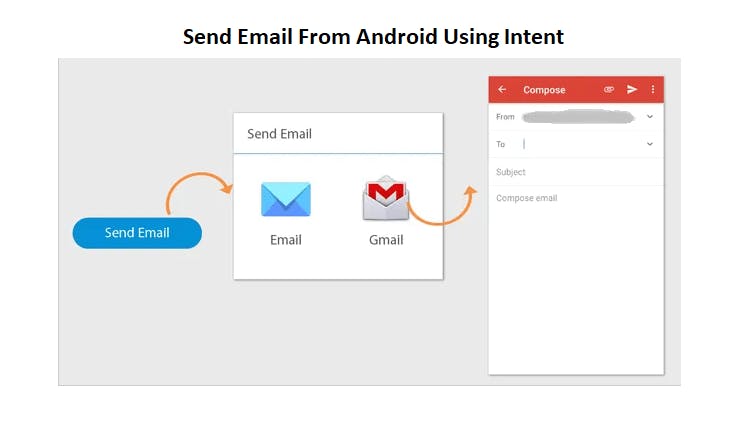
The best and in fact the easiest way to send email in android is to use an Intent.
This is the Android's standard API provided in their standard SDK. You can directly use Intent.ACTION_SEND and call startActivity method to transfer the email sending request, to the Andriod OS. And, then Andriod will basically open an email application with the recipient email address, subject line, and body content already filled out. And, the email sending will be up to the email app installed on the mobile to do the actual sending of the email.
Here is a sample Intent code:
Intent i = new Intent(Intent.ACTION_SEND);
i.setType("message/rfc822");
i.putExtra(Intent.EXTRA_EMAIL , new String[]{"[email protected]"});
i.putExtra(Intent.EXTRA_SUBJECT, "Subject of Your Email");
i.putExtra(Intent.EXTRA_TEXT , "The HTML/TEXT body content of the email");
try {
startActivity(Intent.createChooser(i, "Send mail..."));
} catch (android.content.ActivityNotFoundException ex) {
Toast.makeText(MyActivity.this, "No email client configured. Please check.", Toast.LENGTH_SHORT).show();
}
Note: It is important to use .setType("message/rfc822") in the above code else it will show you all of the applications that support the send intent. You won't notice while you testing on the emulator, but when you go to send a "text/plain" email message on a real device it will give you a list of 15+ apps which supports Intent and may or may not support email sending.
In case you don't want to use Intent, and want to take full control of sending an email within your app then you'll have to write your own client to send the email or best solution is to use the port of JavaMail API for Android.
Prerequisites
In order to use the lightweight JavaMail port of the JavaMail port API in your Andriod application, you'll need to primarily download the following 3 jar files:
Once downloaded, you can put these jar files in the libs directory of your application project.
Now, you're ready with the basic setup, let's proceed further on how to use these jars to send emails.
1. Define a JSSE Provider
The first step is to define a JSSE (Java Security Socket Extension), provider. Here the JSSE provider of the Harmony project is used:
JSSEProvider.java
/* * Licensed to the Apache Software Foundation (ASF) under one or more
* contributor license agreements. See the NOTICE file distributed with
* this work for additional information regarding copyright ownership.
* The ASF licenses this file to You under the Apache License, Version 2.0
* (the "License"); you may not use this file except in compliance with
* the License. You may obtain a copy of the License at
*
* http://www.apache.org/licenses/LICENSE-2.0
*
* Unless required by applicable law or agreed to in writing, software
* distributed under the License is distributed on an "AS IS" BASIS,
* WITHOUT WARRANTIES OR CONDITIONS OF ANY KIND, either express or implied.
* See the License for the specific language governing permissions and
* limitations under the License.
*/

/**
* @author Alexander Y. Kleymenov
* @version $Revision$
*/
public final class JSSEProvider extends Provider {

  public JSSEProvider() {
    super("HarmonyJSSE", 1.0, "Harmony JSSE Provider");
    AccessController.doPrivileged(new java.security.PrivilegedAction() {
      public Void run() {
        put("SSLContext.TLS", "org.apache.harmony.xnet.provider.jsse.SSLContextImpl");
        put("Alg.Alias.SSLContext.TLSv1", "TLS");
        put("KeyManagerFactory.X509", "org.apache.harmony.xnet.provider.jsse.KeyManagerFactoryImpl");
        put("TrustManagerFactory.X509", "org.apache.harmony.xnet.provider.jsse.TrustManagerFactoryImpl");
        return null;
      }
    });
  }
}
2. Implement a DataSource for sending data
Create a byte array to transport data during sending an email.
ByteArrayDataSource.java
public class ByteArrayDataSource implements DataSource {
  private byte[] data;
  private String type;

  public ByteArrayDataSource(byte[] data, String type) {
    super();
    this.data = data;
    this.type = type;
  }

  public ByteArrayDataSource(byte[] data) {
    super();
    this.data = data;
  }

  public void setType(String type) {
    this.type = type;
  }

  public String getContentType() {
    if (type == null)
      return "application/octet-stream";
    else
      return type;
  }

  public InputStream getInputStream() throws IOException {
    return new ByteArrayInputStream(data);
  }

  public String getName() {
    return "ByteArrayDataSource";
  }

  public OutputStream getOutputStream() throws IOException {
    throw new IOException("Not Supported");
  }
}
3. Create Mail Sender
The next step is to create an email sender object. This will primarily contain the logic to send the email.
Note: In this tutorial, GMail is been used as an SMTP server to do the final delivery of emails. In case you want to use a different SMTP server, just change the server details in the below code.
MailSender.java
public class MailSender extends javax.mail.Authenticator {
  private String mailhost = "smtp.gmail.com"; //Hostname of the SMTP mail server which you want to connect for sending emails.
  private String user;
  private String password;
  private Session session;

  static {
    Security.addProvider(new JSSEProvider());
  }

  public MailSender(String user, String password) {
    this.user = user; //Your SMTP username. In case of GMail SMTP this is going to be your GMail email address.
    this.password = password; //Your SMTP password. In case of GMail SMTP this is going to be your GMail password.

    Properties props = new Properties();
    props.setProperty("mail.transport.protocol", "smtp");
    props.setProperty("mail.host", mailhost);
    props.put("mail.smtp.auth", "true");
    props.put("mail.smtp.port", "465");
    props.put("mail.smtp.socketFactory.port", "465");
    props.put("mail.smtp.socketFactory.class", "javax.net.ssl.SSLSocketFactory");
    props.put("mail.smtp.socketFactory.fallback", "false");
    props.setProperty("mail.smtp.quitwait", "false");

    session = Session.getDefaultInstance(props, this);
  }

  protected PasswordAuthentication getPasswordAuthentication() {
    return new PasswordAuthentication(user, password);
  }

  public synchronized void sendMail(String subject, String body,
    String sender, String recipients) throws Exception {
    MimeMessage message = new MimeMessage(session);
    DataHandler handler = new DataHandler(new ByteArrayDataSource(body.getBytes(), "text/plain"));
    message.setSender(new InternetAddress(sender));
    message.setSubject(subject);
    message.setDataHandler(handler);

    if (recipients.indexOf(',') > 0)
      message.setRecipients(Message.RecipientType.TO, InternetAddress.parse(recipients));
    else
      message.setRecipient(Message.RecipientType.TO, new InternetAddress(recipients));

    Transport.send(message);
  }
}
4. Send an email
The next and the final step is to send the email.
Note: And don't forget to add the below line in your manifest. This will give the Internet permission to your AndroidManifest:
<uses-permission android:name=”android.permission.INTERNET” />
Here is the final code to send mail.
Thread.java
new Thread(new Runnable() {

  @Override
  public void run() {
    try {
      GMailSender sender = new MailSender("[email protected]",
         "Your_Gmail_password");
      sender.sendMail("This is a test subject", "This is the test body content",
         "[email protected]", "[email protected]");
    } catch (Exception e) {
      Log.e("SendMail", e.getMessage(), e);
  }
}

}).start();
You're all done now, just launch your Android application and check whether you have received the email or not.
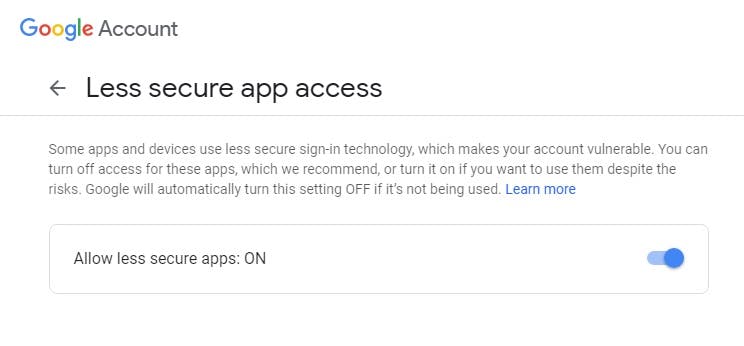
Note: In case you're trying to use GMail SMTP for sending an email and getting the authentication error, then no need to really worry because this is mostly because you have not yet authorized external code access to your GMail account.
Solution: Turn Allow less secure apps: ON from your google account settings.
Visit this link for making the changes: https://myaccount.google.com/lesssecureapps
In case you're getting some error which is not documented as a part of this tutorial then please refer the JavaMail API error library.
Grade My Email
Check your spam now?
Netcorecloud's toolkit is the solution to all your email problems.


You can also explore
Netcore connects & unifies your data across all sources, connects to your marketing channels and provides you with control over AI Powered automation and personalization.


Deploy emails that are
screenshot worthy!

Unlock the Secrets of Your Domain, Discover Limitless Possibilities! ✨
Get a Free Domain Health Check Now!

Dibya Sahoo🥑
Co-founder, Pepipost
Over 12 years of experience, building products to deliver emails ~ 🥑 Developer Relations Guy ~ 🎙️ Speaker