
How to configure the SMTP server in Mautic Email Settings?

Published on 2020-02-19· Updated on 2023-09-06
Introduction
Mautic is an open-source marketing automation platform that helps users with high-level integration with their audience which involves personalization of emails, creating landing pages, creating workflows for improving customer experiences and also has the ability to track audience marketing activities.
It has a built-in CRM and also has the ability to sync third party CRM's leads such as Salesforce, HubSpot or any other of your choice. You can also design workflow according to the leads generated at a certain score threshold and perform the activity of filling the form or sending an email with the link.
Prerequisites
- A working Mautic setup. For any installation-related help, please refer to this link.
- An SMTP service provider like Pepipost.

Step 1: Mautic Setup
Mautic can be installed on any Operating system. It should have a minimum of 4GB RAM so that the Mautic application and crontab associated with the application runs fluently.
- Setting up Mautic on Centos 7
- Setting up Mautic on Ubuntu 18.04
- Setting up Mautic on Windows
Step 2: SMTP configuration
Mautic already has a list of SMTP service provider which you can use by default by just adding their SMTP username and password.
if you want you to use Pepipost has an Email Service provider you can easily set by just following few steps:
1. Login to your Pepipost Account (if you don't have one you can sign up here and get 30,000 emails free).
2. You need to add Domain and get your SPF and DKIM verified.
a. For adding Domain switch to the settings tab -> Domain and add your domain.
b. Once you have added domain copy the SPF & DKIM value and configure at your DNS provider end. (To know more about SPF and DKIM click here).
c. Once you have configured SPF and DKIM. Fill the form for fast track approval.
d. The above configuration finalizes your domain for sending an email, you can see the below page once your domain is ready to send an email.

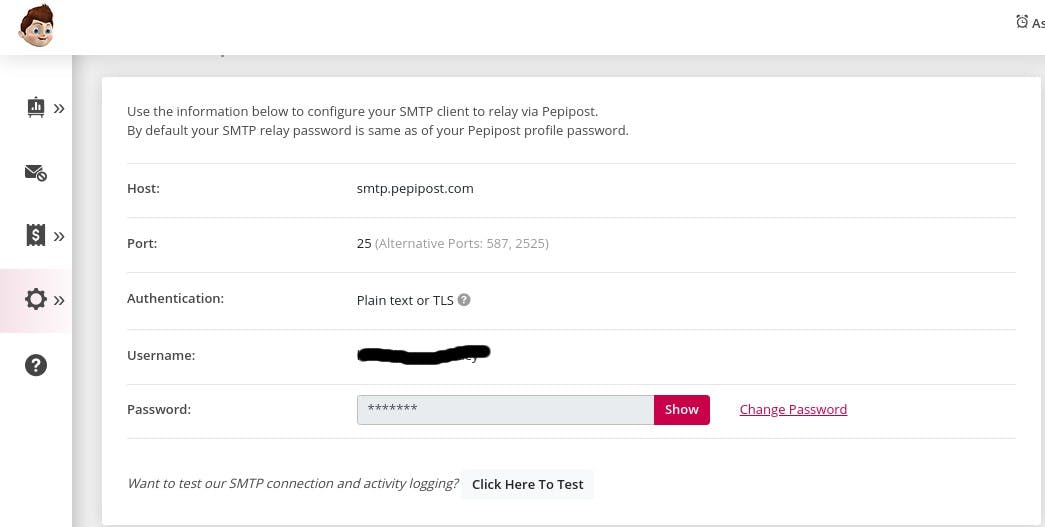
3. In order to configure SMTP with Mautic, we need an SMTP username and password for the Pepipost account.
4. Grab your SMTP username and password by switching to the settings tab -> integration, save it for further configuration in Mautic.
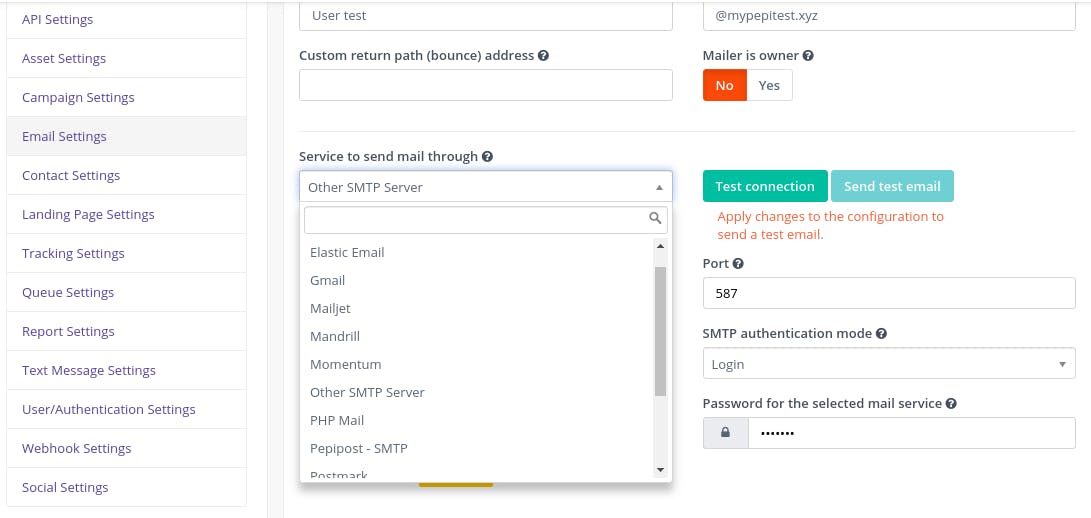
3. For Mautic configuration, Switch to setting tab (click on the extreme right corner after your profile name) -> click for configuration -> Select Email settings.
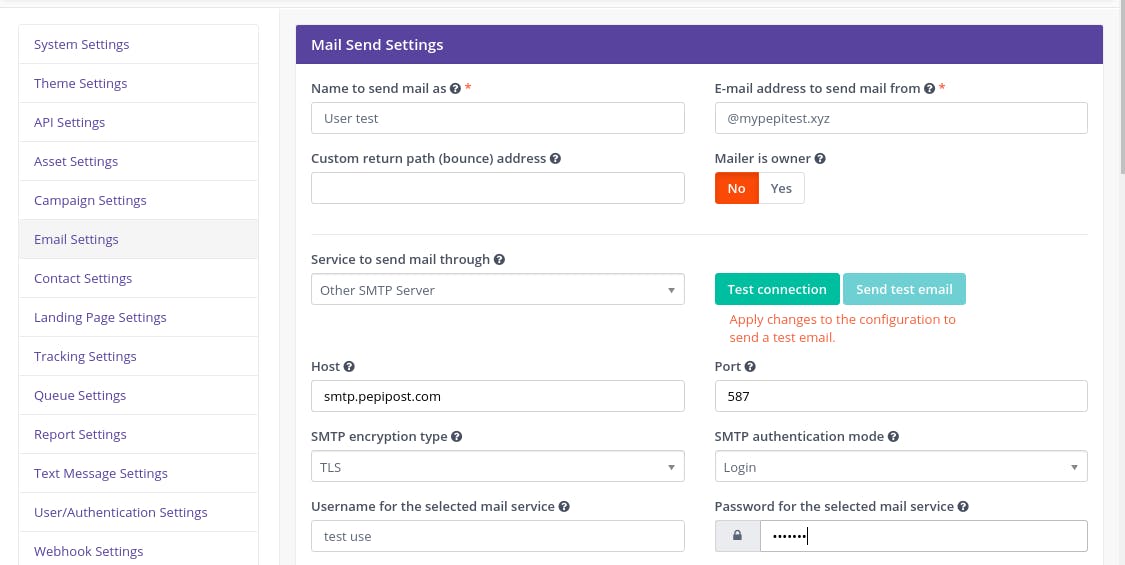
Set your credentials has below:
Service to send mail through: Other SMTP servers
Host: smtp.pepipost.com
Post: 587 (highly recommended way of sending an email)
SMTP encryption type: TLS (encrypted way of passing email from server to server)
SMTP authentication mode: Login
Username for the selected mail service: your Pepipost SMTP username
Password for the selected mail service: your secret Pepipost SMTP password.
Once you are done with the setting just test your connection by clicking the Test connection button.
The above configuration will allow you to send emails through Pepipost using Mautic.
Conclusion:
Mautic helps you send different emails based on your campaign and tags with different SMTP configurations.
Grade My Email
Check your spam now?
Netcorecloud's toolkit is the solution to all your email problems.


You can also explore
Netcore connects & unifies your data across all sources, connects to your marketing channels and provides you with control over AI Powered automation and personalization.


Deploy emails that are
screenshot worthy!

Unlock the Secrets of Your Domain, Discover Limitless Possibilities! ✨
Get a Free Domain Health Check Now!

Vikram Sahu 🦉
Developer Evangelist, Pepipost
💻 Senior Software engineer → 🥑 Developer Relations guy → 🤓 Building Community for Email Geeks 🎟 → Speaker 🎙