

Introduction
Mautic is one of the popular open-source Marketing automation application which can be used for multiple use cases of marketing paradigm. It ranges from sending bulks emails by uploading an Email list, Scheduling and Creating campaigns, Sending SMS and User journey.
Mautic is more powerful if it is hosted on a cloud server having a decent configuration. There are various famous cloud providers like Amazon's AWS, Digital Ocean, Microsoft's Azure, Linode and many similar. In this tutorial, you will be installing Mautic on DigitalOcean's Droplet.
Prerequisites
- A Digital Ocean account.
- A Mautic zip file.
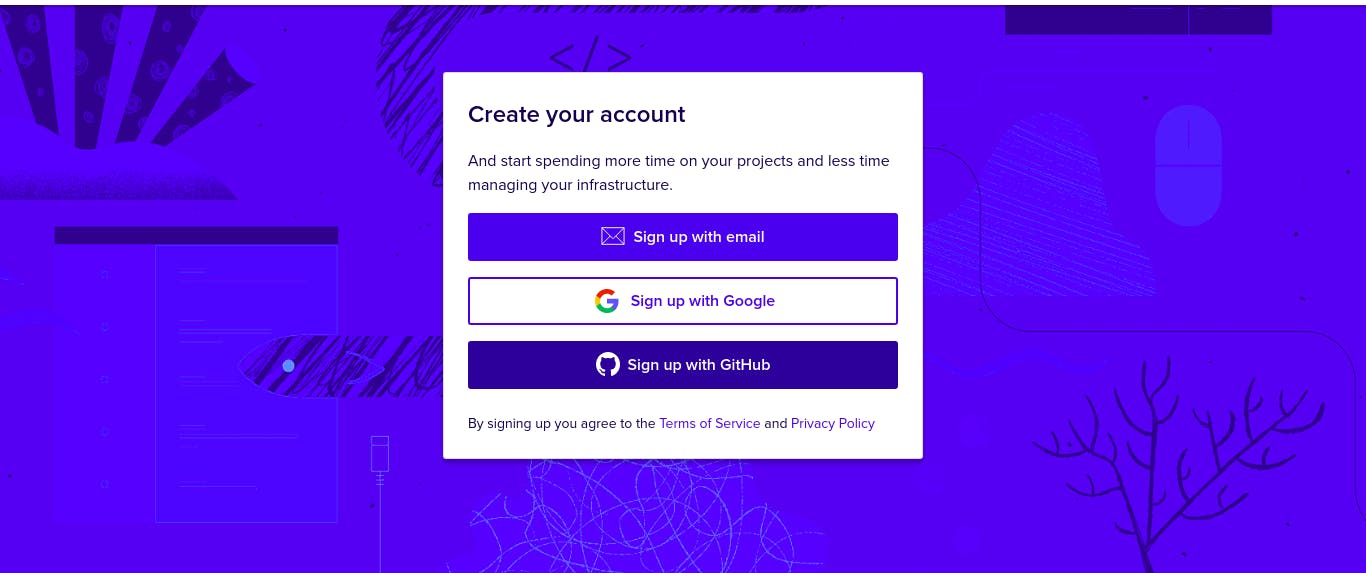
Step 1: Create an Account on Digital Ocean
Sign up with any one of your credentials.
1. Gmail (OAuth).
2. Github (OAuth).
3. Email (personal id).
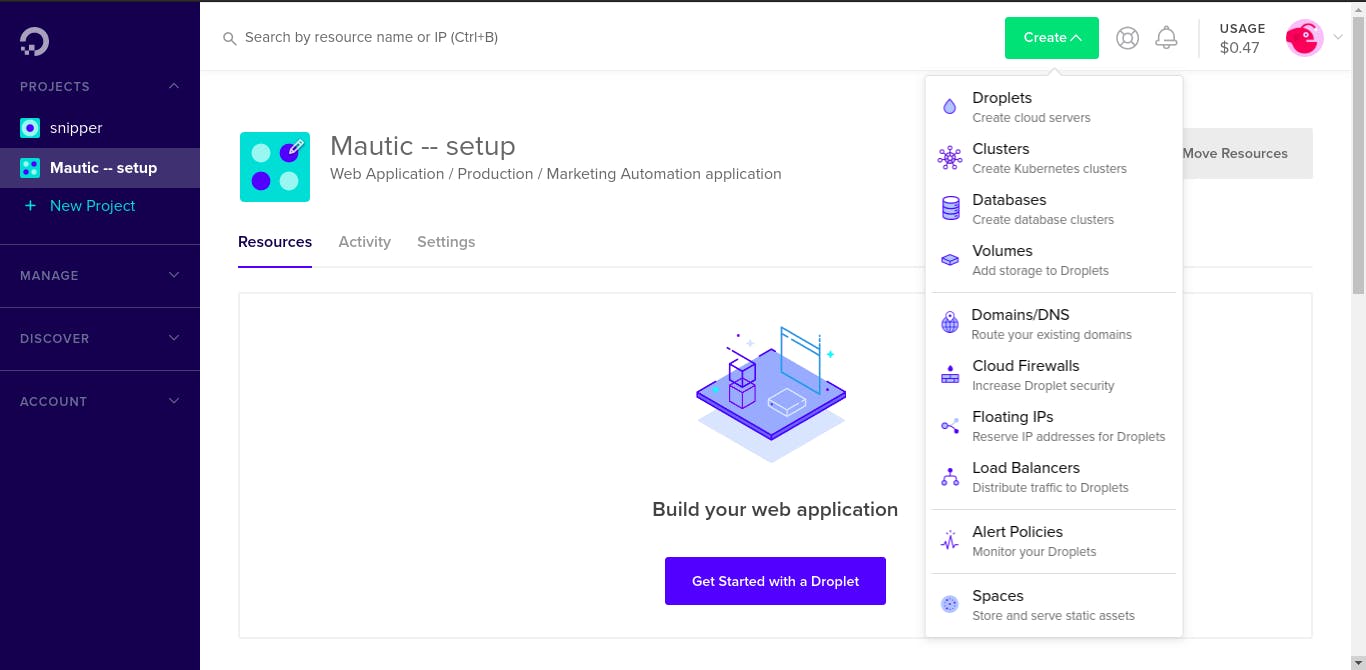
Step 2: Create a Droplet
Digital Ocean droplets are new jargon for the VMs (Virtual Machines) which are Linux-based and hosted on virtualized hardware. Creating a new Droplet means creating a new server.
Once you have signed up you can see a dashboard with the option Create on the right corner. Just click and select Droplet as shown below.
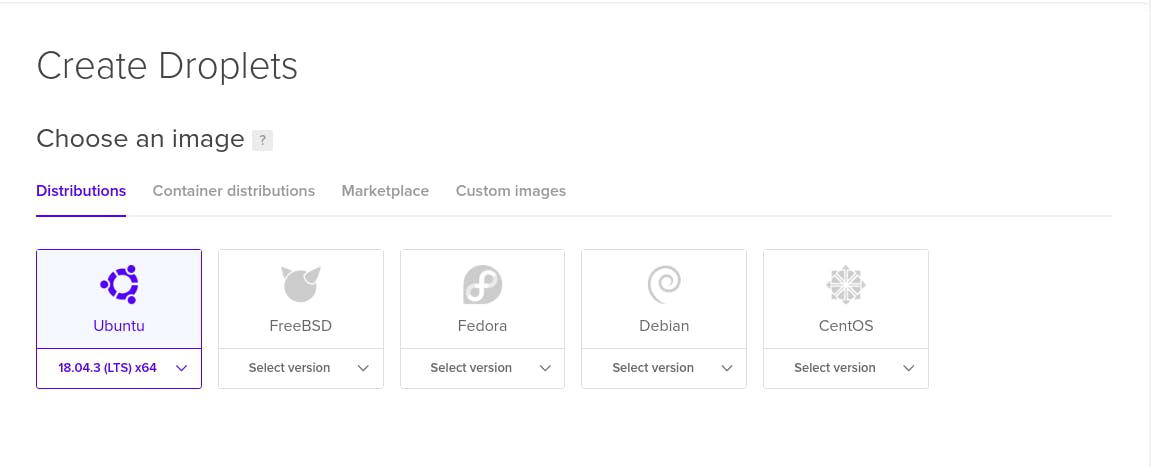
Step 3: Selecting/Setting up an Operating System for Droplet.
For creating a droplet you need to choose an operating system by selecting one of the below OS with different versions (latest version recommended) which includes:
1. Ubuntu.
2. FreeBSD.
3. Fedora
4. Debian
5. CentOS.
Step 4: Choosing the Best plan for Mautic.
Mautic is the powerful compact pack for Marketing so we need to choose a server with a good configuration that should have a minimum cost.
There are two section Starter and Performance, choosing any one of the section is fine but I would recommend having any one of the below with respect to the section:
1. If you are choosing Performance, go with CPU-Optimized having the following config:
a. 4GB / 2CPUs.
b. 25GB SSD disk
c. 4 TB transfer
which will cost you $40/month but the application will run very fluently without any investment of time in optimization.
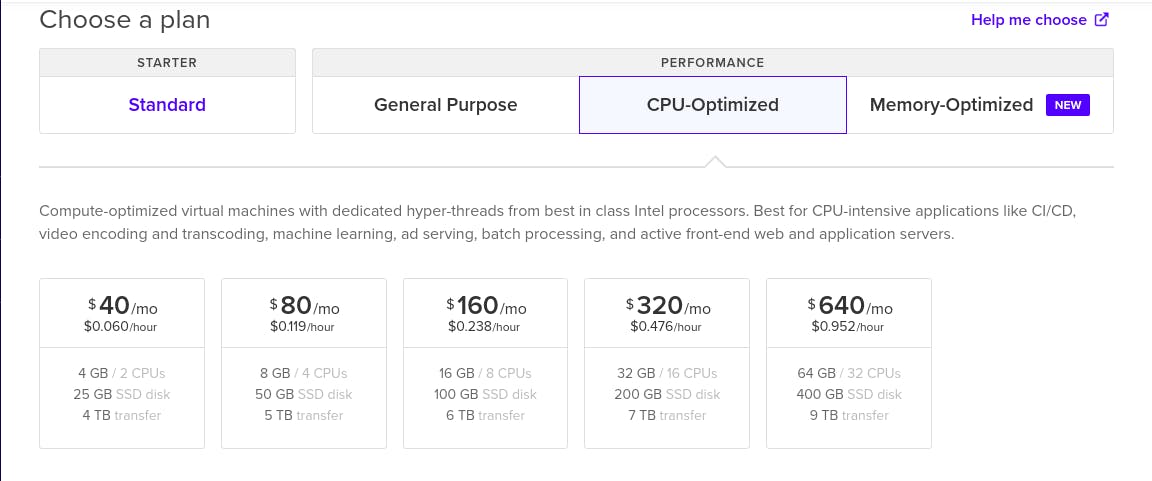
2. If you are choosing a Starter, you can go with the following configuration:
a. 4GB / 2CPUs.
b. 80GB SSD disk.
c. 4 TB transfer.
which will cost you around $20/month. It totally depends on the data you will have while using Mautic.
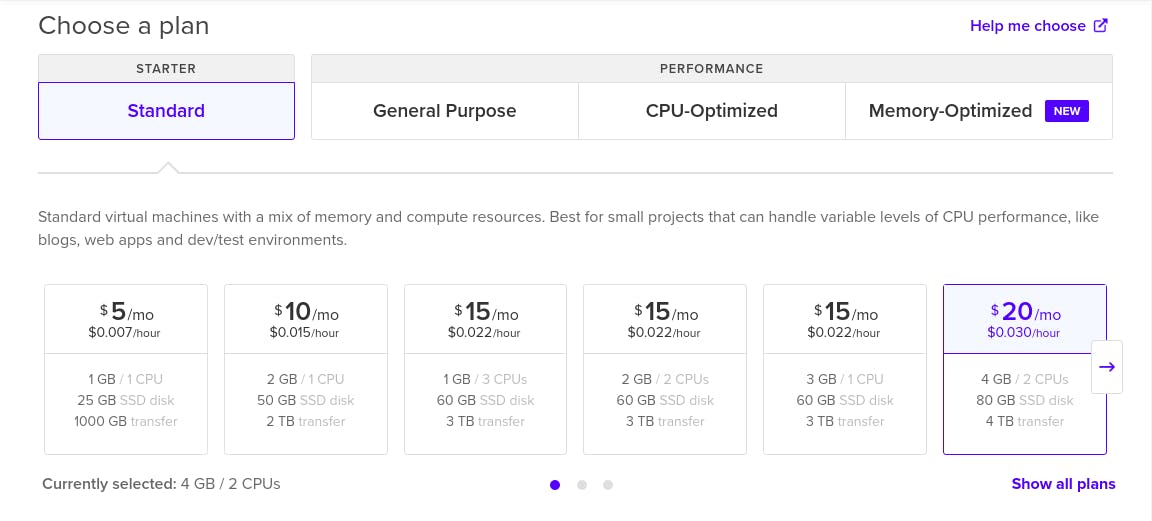
Note: The above plans are just recommendations you can have different also, to know about plans and categories you can check at DigitalOcean website.
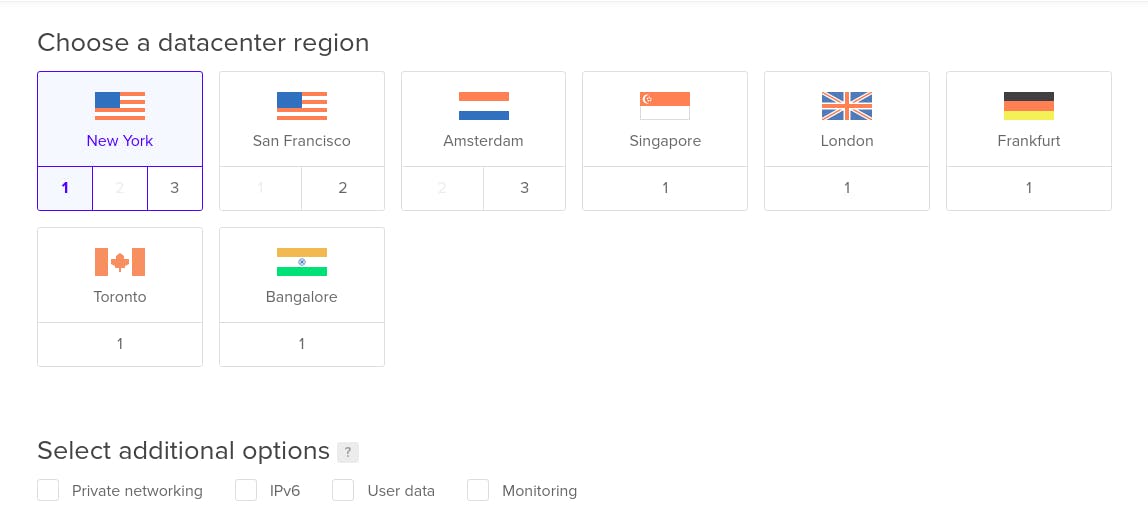
Step 5: Choosing Datacenter and other additional options.
Datacenters are usually a physical place where your virtualized hardware is deployed. Choosing datacenter is equally important to choose a VM so datacenters should be the nearest location where your clients will be accessing your application.
Other additionals options as Private networking, IPv6, Userdata, and Monitoring can be enabled for better security and debugging.
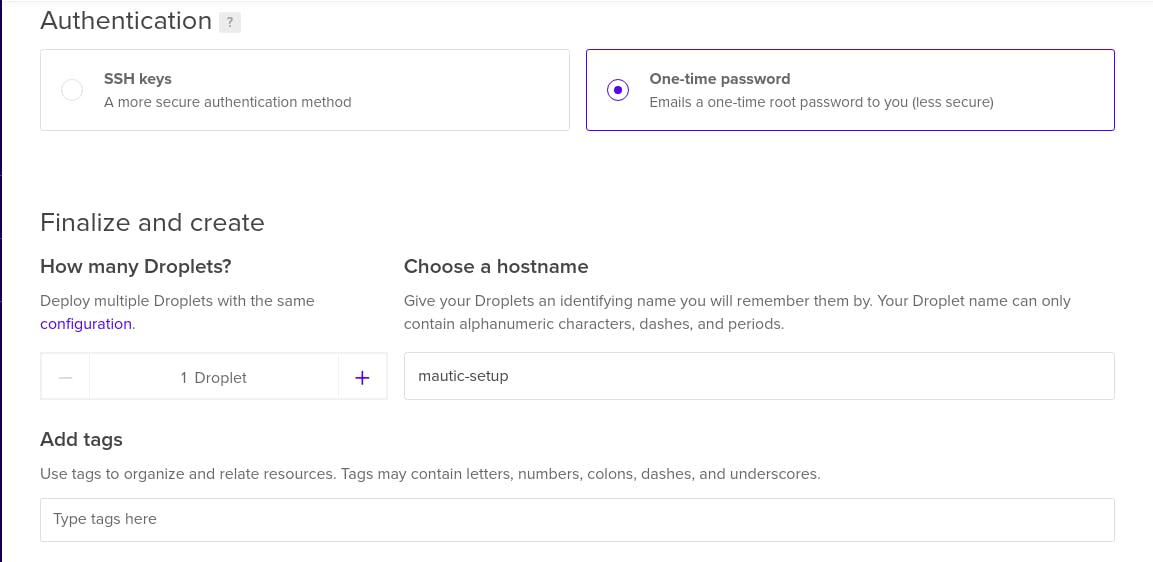
Step 6: Setting up server Authentication & Naming server.
Digital Ocean provides two ways of Authentication:
1. SSH keys: SSH keys are the best way to secure your server. This method is considered a more secure authentication method than a normal username and passwords. you can click and set up easily by following this method.
2. Login Method: This method is considered less secure but you can set-up a difficult password in order to make a difficult login layer. One time password will be sent to you on the registered email id and the first login will make you forcefully change the password.
In case of setting up the final hostname, we will recommend choosing a simple name for your server like mautic-application in our case or it can be a domain name that you want to keep once the server setup is done.
Adding tags is optional but setting up tags is considered good practice so that you don't mess up later when you have multiple servers.
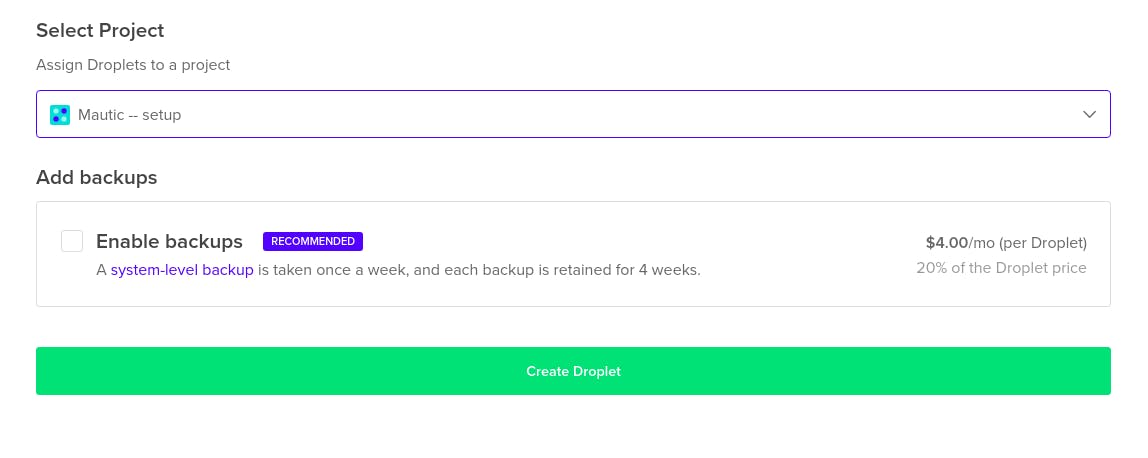
Step 7: Setting up Project and Backups
Assigning Project to Droplets are similar to segregating servers for simplicity and Backups are usually taken for safety if something unintentional happens so that data is not lost.
Step 8: Finalizing Droplet creation.
Once everything has been done with the above step and you just need to click on the create droplet button. you will get a fresh server with all the above-selected configuration.
Note: It takes a few minutes so don't panic if it is slow.
Step 9: Installing Mautic
Installation guides are already available at pepipost you can check the below links:
1. Installing Mautic on Ubuntu.
2. Installing Mautic on CentOS.
3. Everything about Mautic.
Conclusion
The above step will help you in setting up a droplet at DigitalOcean from scratch and installation of Mautic so that you can have your own Marketing platform at the end of the tutorials.
Grade My Email
Check your spam now?
Netcorecloud's toolkit is the solution to all your email problems.


You can also explore
Netcore connects & unifies your data across all sources, connects to your marketing channels and provides you with control over AI Powered automation and personalization.


Deploy emails that are
screenshot worthy!

Unlock the Secrets of Your Domain, Discover Limitless Possibilities! ✨
Get a Free Domain Health Check Now!

Vikram Sahu 🦉
Developer Evangelist, Pepipost
💻 Senior Software engineer → 🥑 Developer Relations guy → 🤓 Building Community for Email Geeks 🎟 → Speaker 🎙