
How to integrate Pepipost SMTP with Sendy

Published on 2019-09-16· Updated on 2020-01-02
The author voluntarily contributed this tutorial as a part of Pepipost Write to Contribute program.
Introduction
Sendy is an application that lets you send your emails through email campaigns. In order to integrate Pepipost SMTP with Sendy please follow the step by step guidelines provided below.
Prerequisites
- The latest version of Sendy Installation on a preferred domain
- A user account with Pepipost. If you don't have one, click here to signup and get 30,000 emails free every month
- A valid and verified domain name
- Your pepipost SMTP credentials
Installation
Step 1: Overriding AWS keys:-
- Login to your Sendy’s user panel
- Go to your user setting by following link https://<sendy-installation-path>/settings
- Check for “Amazon Web Services Credentials” section, once you find that delete the keys present in <AWS Access Key ID> and <AWS Secret Access Key> fields as shown in the screenshot below. And click on save.
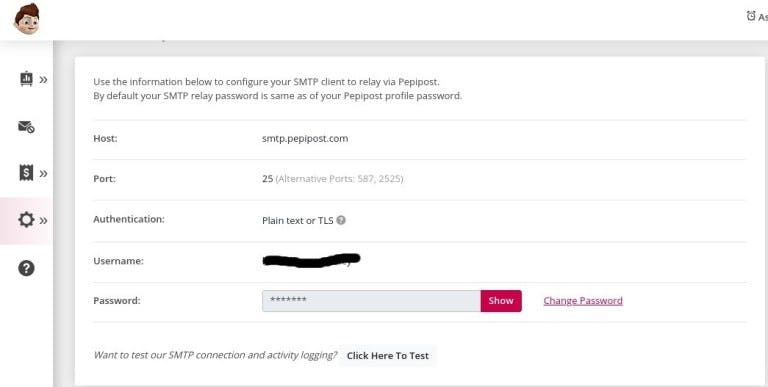
Step 2: Get your Pepipost SMTP credentials:-
- Log in with your user credentials on pepipost application
- Open SMTP integration panel using this link
- You will find your SMTP credentials in SMTP Relay tab
Please check the screenshot provided below for reference:
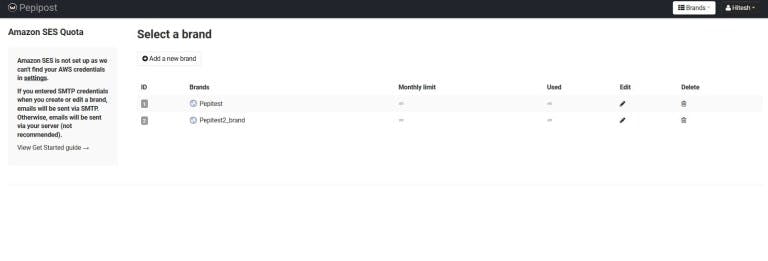
Step 3: Updating your SMTP credentials in your brand panel:-
- Open your brand listing panel by clicking on your logo.
- You will see the list of your created brands, click on the edit option.
3. Find the SMTP settings option in the current dashboard and paste your Pepipost SMTP credentials for their respective SMTP fields like shown in the image provided below:
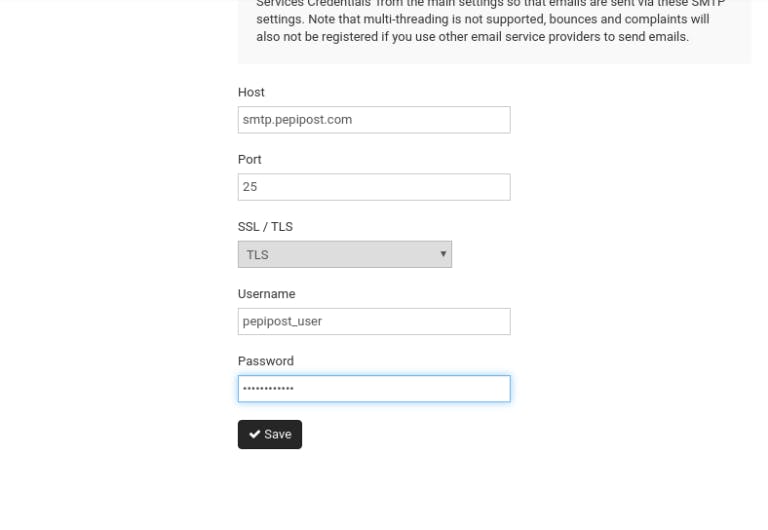
4. Click on save.
(You need to change the SMTP credentials for each brand you have created in order to send mails through your preferred SMTP credentials)
Once you hit the save button all your SMTP credentials will be saved to the brand panel of Sendy and now you are ready to send mails through Pepipost as a relay integration but you won’t be able to track the user mails through Sendy, unless you integrate webhook. In order to check the logs, there are two ways you can check by logging in to pepipost application or using pepipost webhook that is integrated with Sendy which can be done through the below step.
Tracking emails using webhooks
Tracking emails will allow you to understand the impact of your email campaign by taking into account user events that are receiving emails, which in return lets you determine strategies to further improve your campaign’s success.
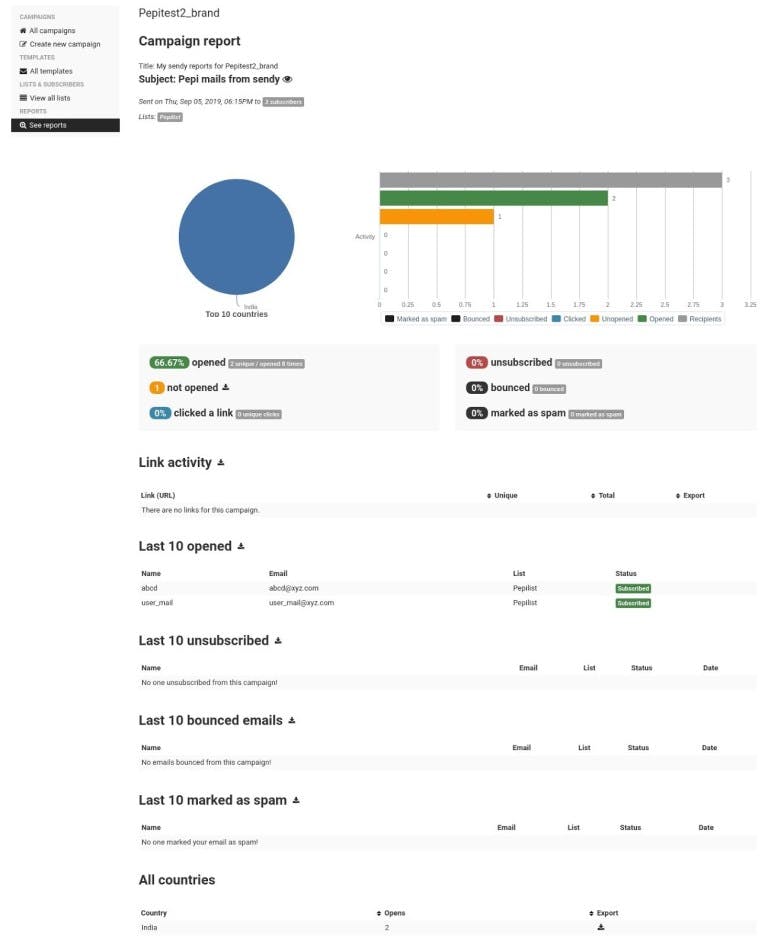
For instance, you can track the number of users that have clicked a link, Opened the email, Not opened the email, Bounced emails and so on in Sendy’s reports panel.
You can find the tracking information in the report section.
For viewing reports click on [your-brand-name] -> [See reports]
The following screenshot represents how Sendy displays user email tracking information:
Custom Code Library for Sendy-Pepipost Webhooks Integration
For you to be able to track your emails and see it in the Sendy’s reports section, you will have to set up webhooks for Pepipost in your Sendy installation folder.
To do this, please click here for detailed steps of Pepipost webhooks installation.
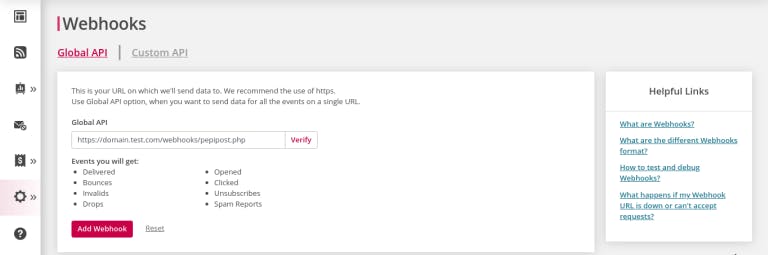
You can integrate the created webhook file with Pepipost, by adding the path to the Sendy webhook file in the Pepipost user panel as shown in the screenshot below:
Conclusion:
By following the above-mentioned steps, you will be ready to send emails and track email activities through Pepipost.
Grade My Email
Check your spam now?
Netcorecloud's toolkit is the solution to all your email problems.


You can also explore
Netcore connects & unifies your data across all sources, connects to your marketing channels and provides you with control over AI Powered automation and personalization.


Deploy emails that are
screenshot worthy!

Unlock the Secrets of Your Domain, Discover Limitless Possibilities! ✨
Get a Free Domain Health Check Now!

Hitesh Pandey💻
Full Stack Developer, Pepipost
🥑 Developer Evangelist | 🥇Email Geek