

Introduction
Mautic is a very popular email marketing and lead management software that can be used to create customized email templates and email campaigns. Here are the detailed steps you need to follow to install Mautic on your Windows Server or on your Windows local machine.
Prerequisites
- Windows OS (Server or Desktop)
- Admin access to set tasks and directories
- An account with Pepipost or any other SMTP e-mail service

Installation
Step 1: Open the Bitnami Mautic Stack installers page by clicking here.
Step 2: Click on [Win / Mac / Linux] option
Step 3: You will click on [Download for Windows] option, for windows installation
Step 4: After downloading the exe setup file, follow the setup wizard for the installation.
Setup
The installation through setup wizard is really simple. You can just click on the Next button for all the steps until you reach Admin user settings. For setting up credentials follow these steps below.
Step 1: Set Admin user settings
Enter your preferred Admin credentials as specified in the screenshot below, these credentials will be used when logging in the Mautic user panel.
The email address you enter will be used for password resets.

Click on the Next button.
Step 2: Set your server domain name
The second window will be for the domain name of your server.
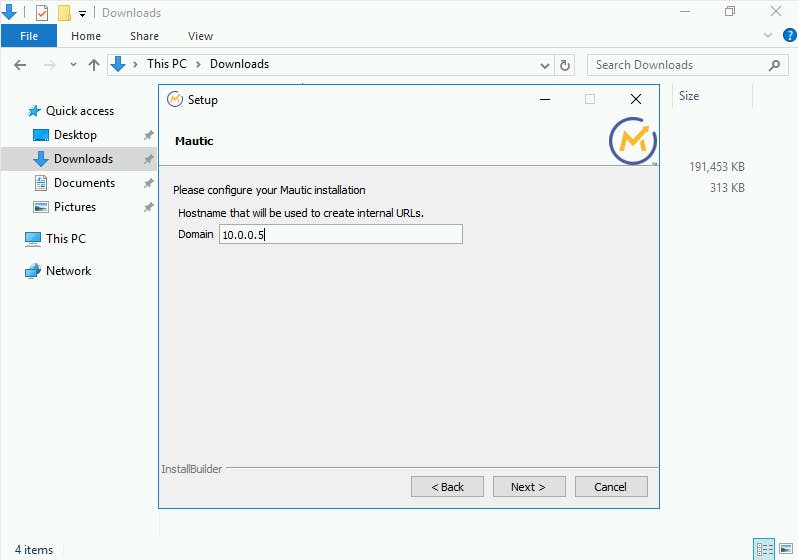
Please set your accessible domain name here so you can access this panel through your server domain.
Step 3: Select the email setup.
You can opt for your email provider between Gmail and Custom. For this tutorial please select Custom to continue.
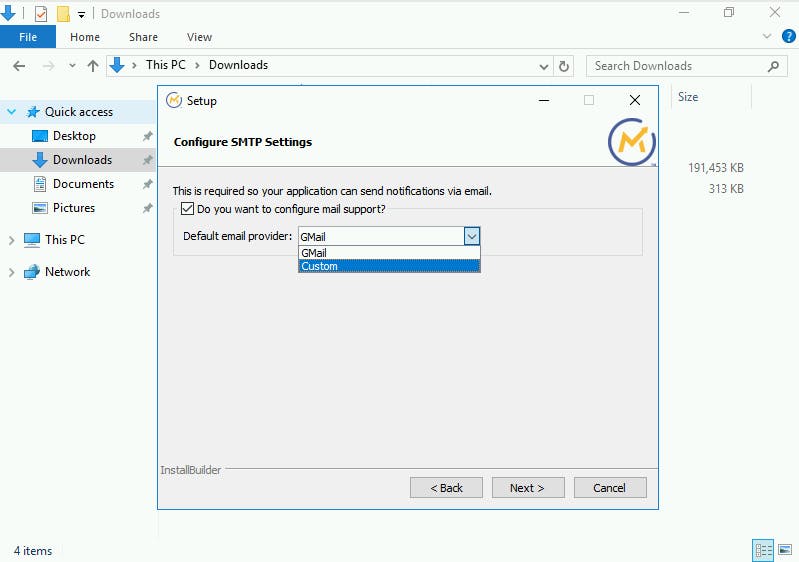
The next setup window will be for setting up your SMTP credentials, so before you proceed to the next step you will need Pepipost SMTP credentials.
Step 4: Login to pepipost
Follow these steps:
- Log in with your user credentials on Pepipost application
- Open SMTP integration panel using this link
- You will find your SMTP credentials in SMTP Relay tab
Please check the screenshot provided below for reference:
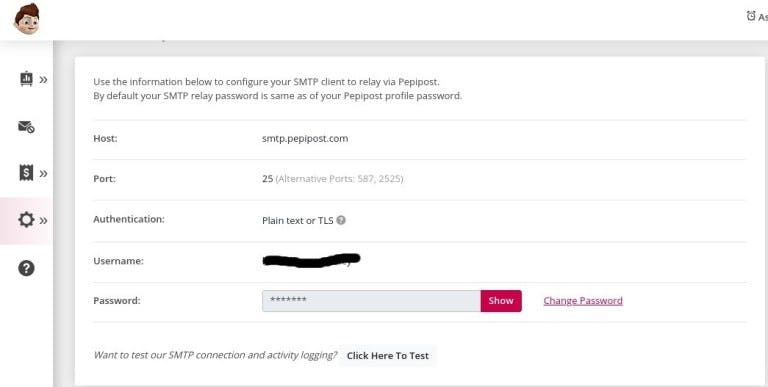
You will use these credentials to set up SMTP configuration in the next step
Step 5: Setting the SMTP configuration settings
Now back at the Mautic installation window set the following parameters:
SMTP Host: smtp.pepipost.com
SMTP Port: 25 [or you can set the port to 587 if port 25 is blocked at your sever]
Secure connection: TLS
Username: Your_Pepipost_SMTP_username
Password: Your_Pepipost_SMTP_password
Re-enter: Re-enter your password
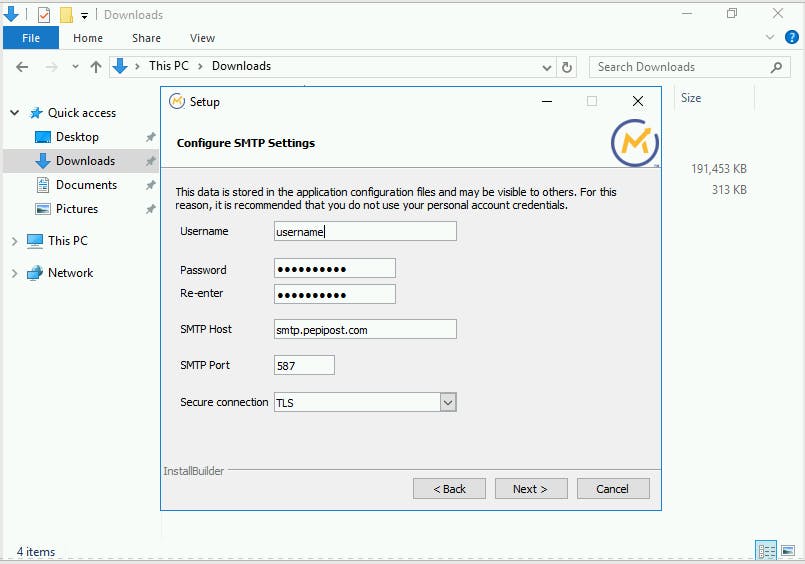
Click on Next
For the next two steps click on the Next button for each installation window.
After this, the installation of the Mautic stack will start, it would take some time to install everything so be patient with the installation.
After the installation, click on the Finish button this will open up your browser on the Mautic login panel.
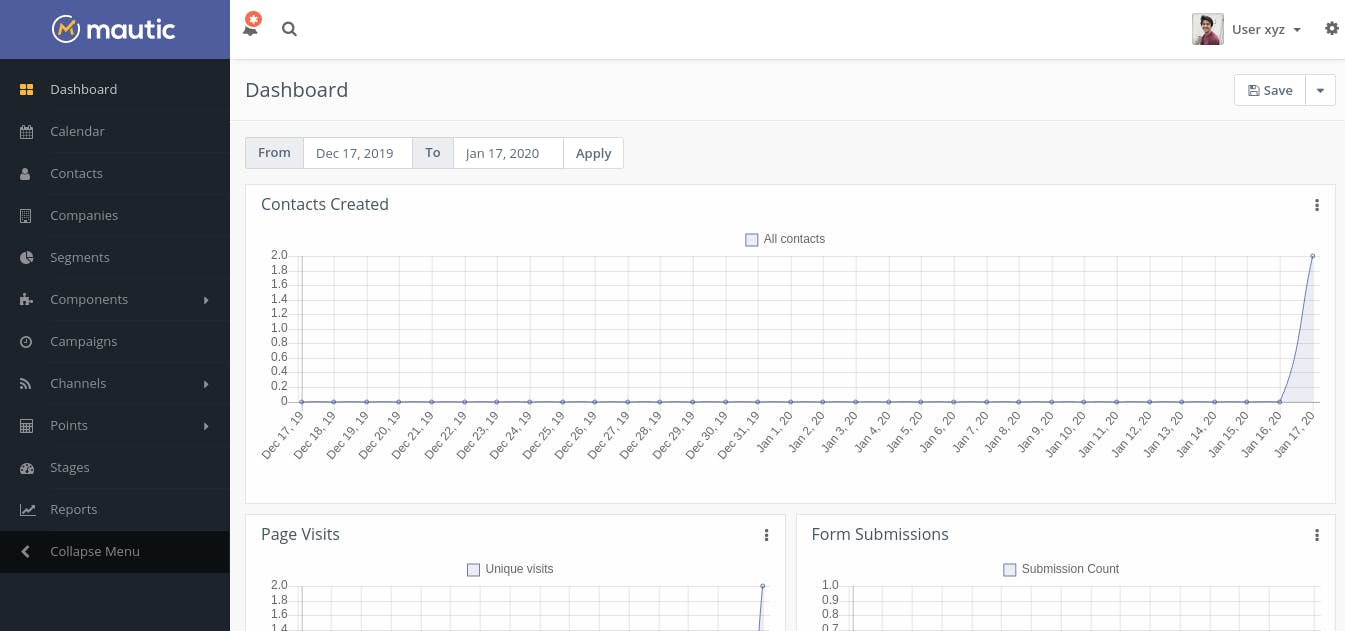
This is how your dashboard will look after login.
Note:- If a process is already using the port 80 you will be prompted to add a new port for the Mautic instance to run. In this case, set a free port and with that, you will be opening your Mautic instance on the browser by <site-address>:specified_port_number.
For example www.domain.com:8081 or 122.133.144.155:8081
Adding Scheduled Tasks:
Scheduled tasks are nothing but a scheduler that runs the specified file path at a specified interval. Every action and updates done in the Mautic is mostly done by the Scheduled tasks running at regular intervals, If they are not set most of the Mautic's functionalities won't work.
Add the following Scheduled tasks
# Populates the segments with new contacts
schtasks /create /sc hourly /st 00:15 /tn mauticCronJob01 /tr installdir/php/php installdir/apps/mautic/htdocs/app/console mautic:segments:update --env=prod /ru "System"

# Updates campaign with contacts and credentials
schtasks /create /sc hourly /st 00:20 /tn mauticCronJob02 /tr installdir/php/php installdir/apps/mautic/htdocs/app/console mautic:campaigns:update --env=prod /ru "System"

# Runs the campaings
schtasks /create /sc hourly /st 00:25 /tn mauticCronJob03 /tr installdir/php/php installdir/apps/mautic/htdocs/app/console mautic:campaigns:trigger --env=prod /ru "System"

# Sends the emails in the email queue
schtasks /create /sc hourly /st 00:35 /tn mauticCronJob04 /tr installdir/php/php installdir/apps/mautic/htdocs/app/console mautic:emails:send --env=prod /ru "System"

# Runs the webhook
schtasks /create /sc hourly /st 00:45 /tn mauticCronJob05 /tr installdir/php/php installdir/apps/mautic/htdocs/app/console mautic:webhooks:process --env=prod /ru "System"
Based on the Scheduled tasks set up, your contacts, campaigns, and emails will be triggered, you might want to change the time interval of all of these Scheduled tasks based on your requirements.
To add these commands using the Windows UI interface follow these steps:
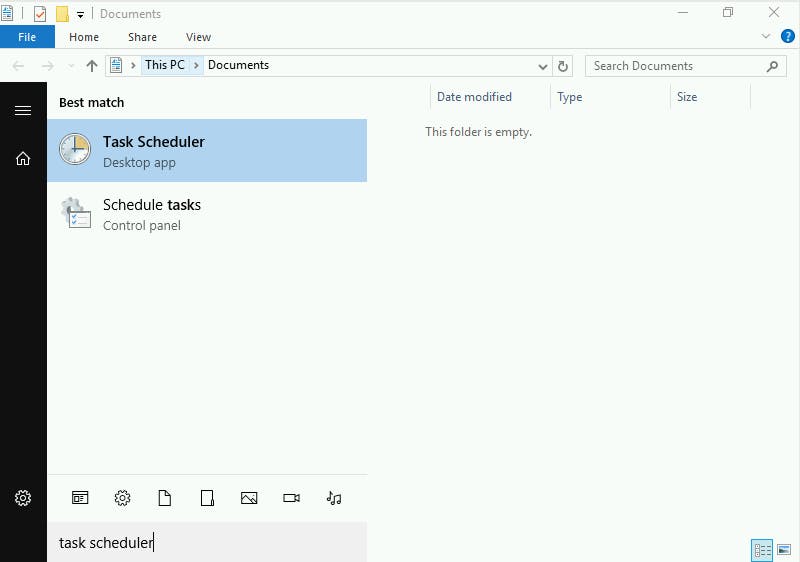
Step 1: Open the task scheduler
Press the Windows/flag button and search "Task scheduler".
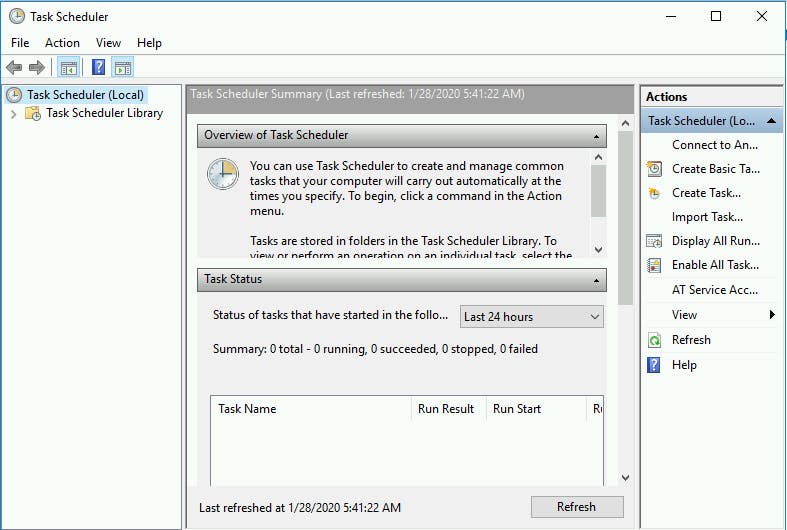
Step2: Create a new task.
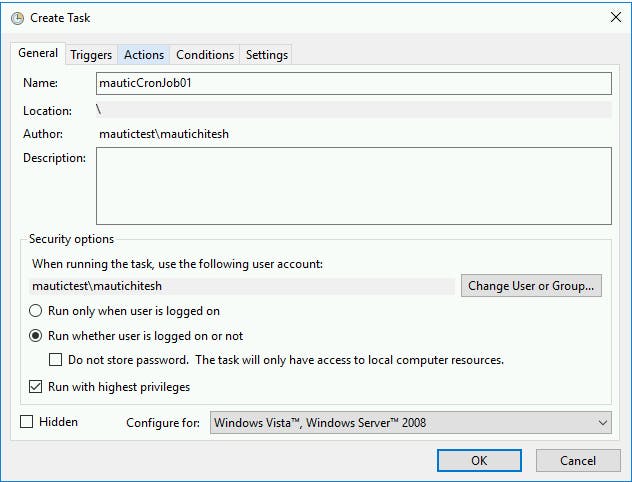
- Click on Create Task on the right section, a task creation window will open on the General tab. Set the Name and Security options as shown below
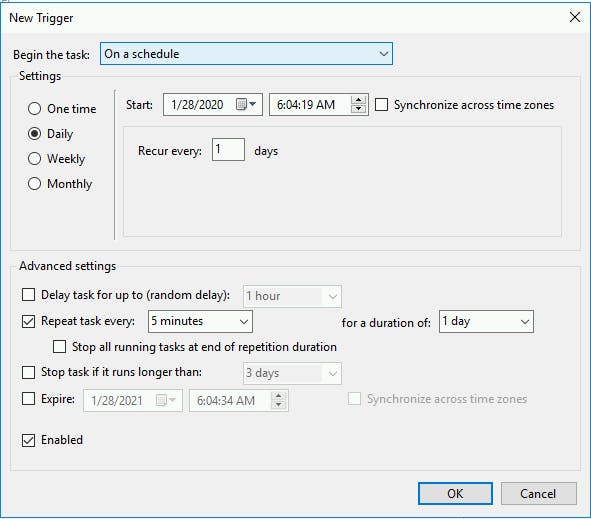
- Click on the Triggers tab and create a new trigger
- Set the Start date/time and set the repeat intervals as displayed below
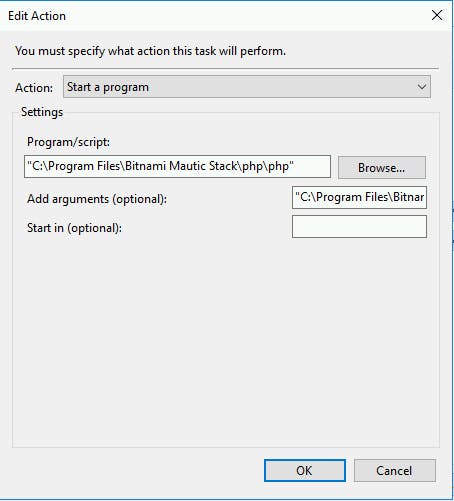
- Click on the Action tab and create a new action
- Set [Action] to <Start a program>
- Set [Program/script] to <"installdir\php\bin\php">. Replace the installdir placeholder with the full installation directory for your Bitnami stack, in this case it is <"C:\Program Files\Bitnami Mautic Stack\php\php">
- Set [Add/arguements] to <"installdir\apps\mautic\htdocs\app\console" mautic:webhooks:process> which will be <"C:\Program Files\Bitnami Mautic\apps\mautic\htdocs\app\console" mautic:webhooks:process> in this setup
- Click on ok
- With this your Task for segment update is added to the list you can repeat the same process for all of the remaining tasks.
Note: It is recommended that the Scheduled task doesn't run at the same time, so keep the tasks interval timings unique.
Sending your first test mail
Step 1: Add new contacts
There are two steps for creating new contacts
1. Single contact creation
- Click on contacts in the navbar
- Click on New
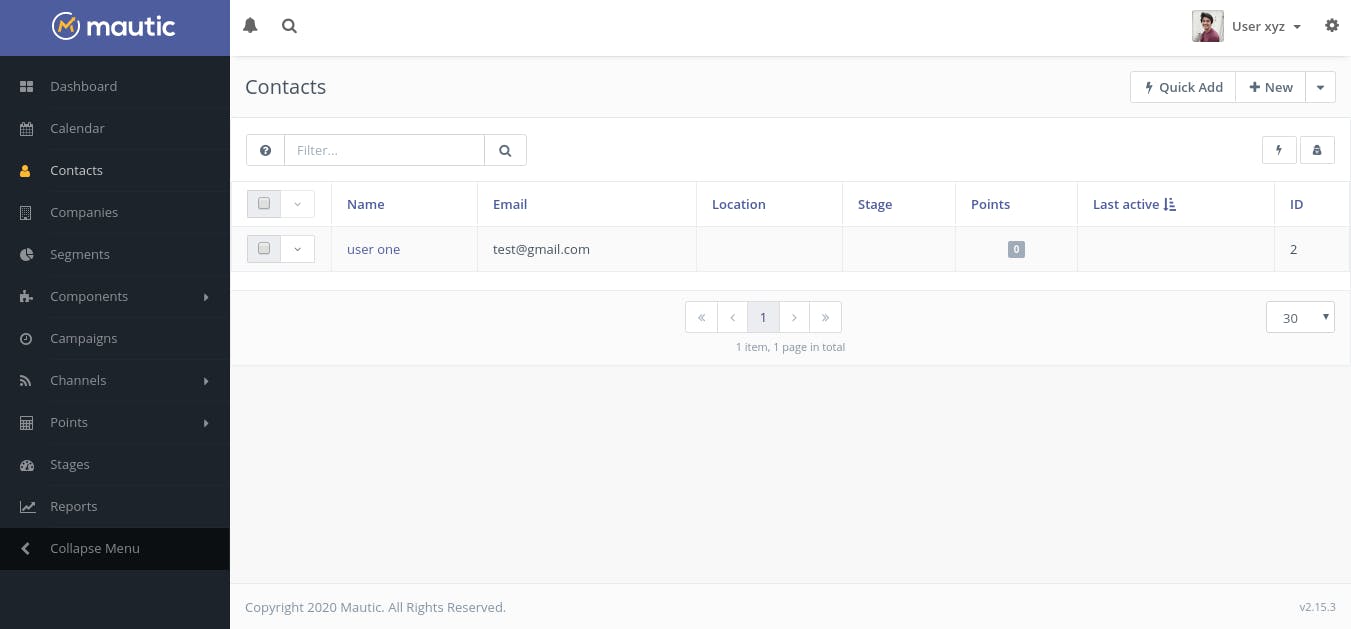
- You will be able to view a detailed form in which you can add user credentials, for testing purposes you can add email and username.
- Click on [Apply]
- Click [Save & Close]
- In your contact panel, you will be able to see the newly created contact
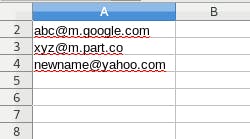
2. Bulk Upload email list
- Create a new CSV file with a list of emails that you want to send your emails to. Refer below image for CSV file reference.
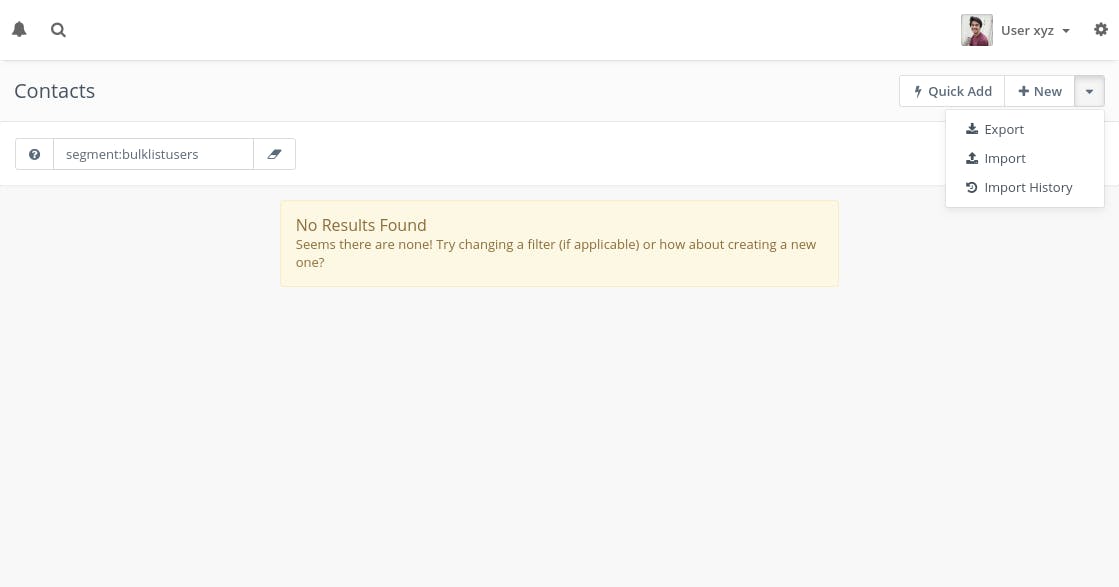
- Click on contacts in the navbar
- Click on the dropdown arrow next to New button
- Click on import
- File upload panel will open
- Click on choose file
- Select the CSV files of email list and click on upload
- You can change the limit option when you are uploading a large CSV file, this parameter decides the number of email batches that Mautic will start importing at a time.

- After this, you will be redirected to the Import panel, where you can select multiple options for the upload.
- There are two sections in this panel the first one is optional which you can set to customize your import
- In the second section, the values will be visible above the dropdown select the appropriate dropdown value according to the value above it, for example, Clients First Name should be assigned to First name dropdown and email address to email as shown in the screenshot below.
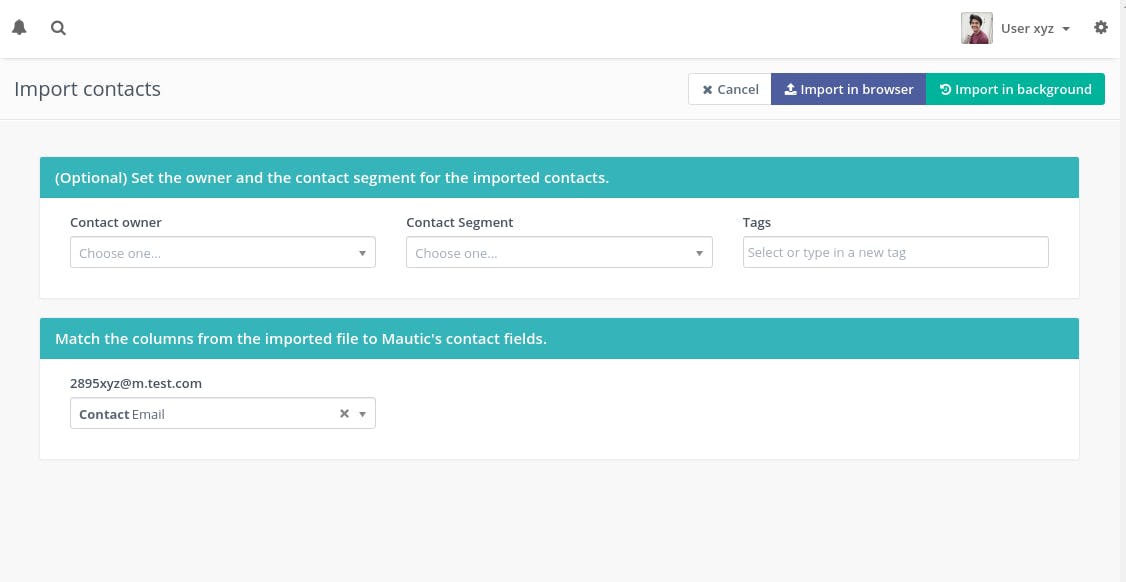
- Now there are two options to import, First is Import in the browser(For small email lists that could be in hundreds or a thousand) in which the import needs the browser window to stay open. It is faster and you will be able to see the progress through a progress bar but is not recommended for a very large email list.
- The second is import in the background which is recommended for a large import list which could be in the ten thousand or in millions but doesn’t need the browser to be kept open.
- After the import, the success message would be displayed and you can view the imported contacts.
Step 2: Create a new segment
- Click on Segments in the navbar
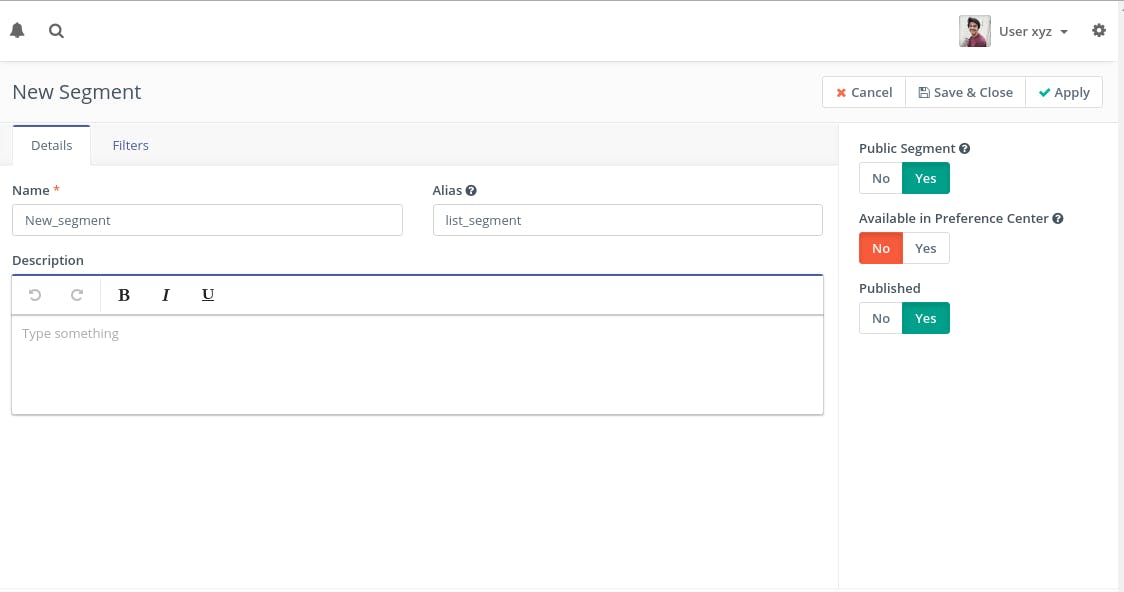
- There would be no segments created In the segments panel right now so click on New button
- Enter segment name and alias (you can leave this empty, it will autogenerate if it is set to blank)
- Click on the Filters tab
- Now you will be filtering the email list on email address, So in the dropdown select the email
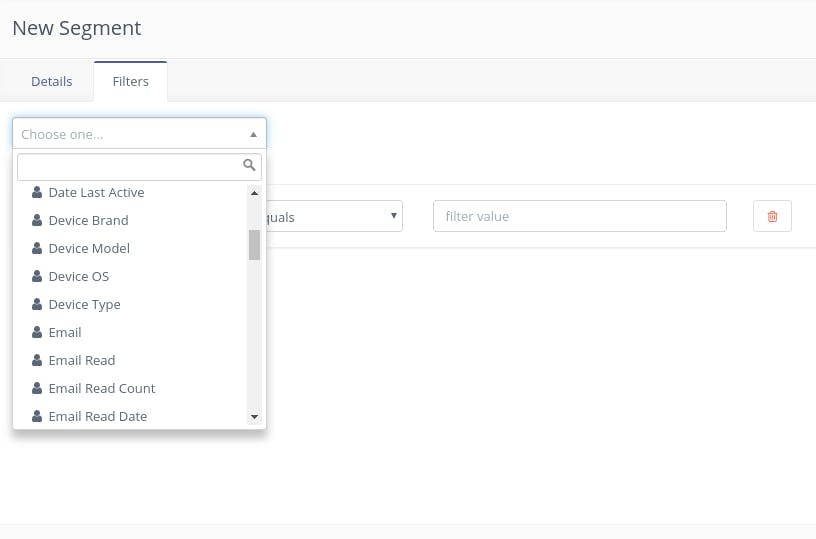
- Set the email filtering conditions based on which particular emails will be grabbed from your email list to your campaign.
- You can use the filtering in a really flexible way to filter out the emails, for more information on segments please refer this link
- For this tutorial, In order to select all emails in the list, you can set the filter on the Email to not empty.
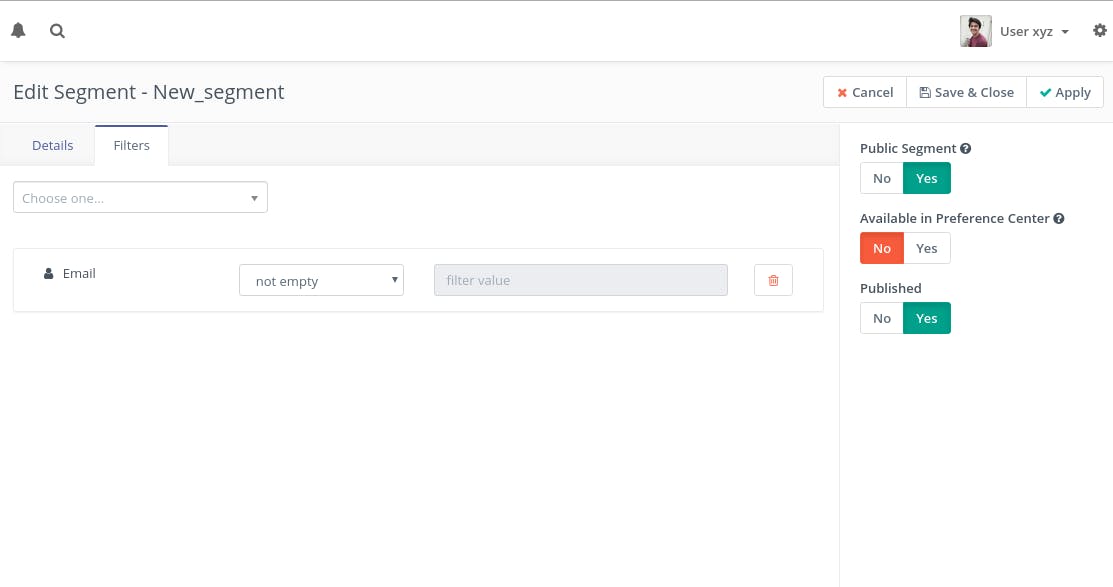
- Click on Apply -> Save & Close
- Depending upon the Cron set up your segment list will be populated
Step3: Create a new campaign
- Click on campaigns section in the navbar
- Click on the New button
- Enter campaign name and description
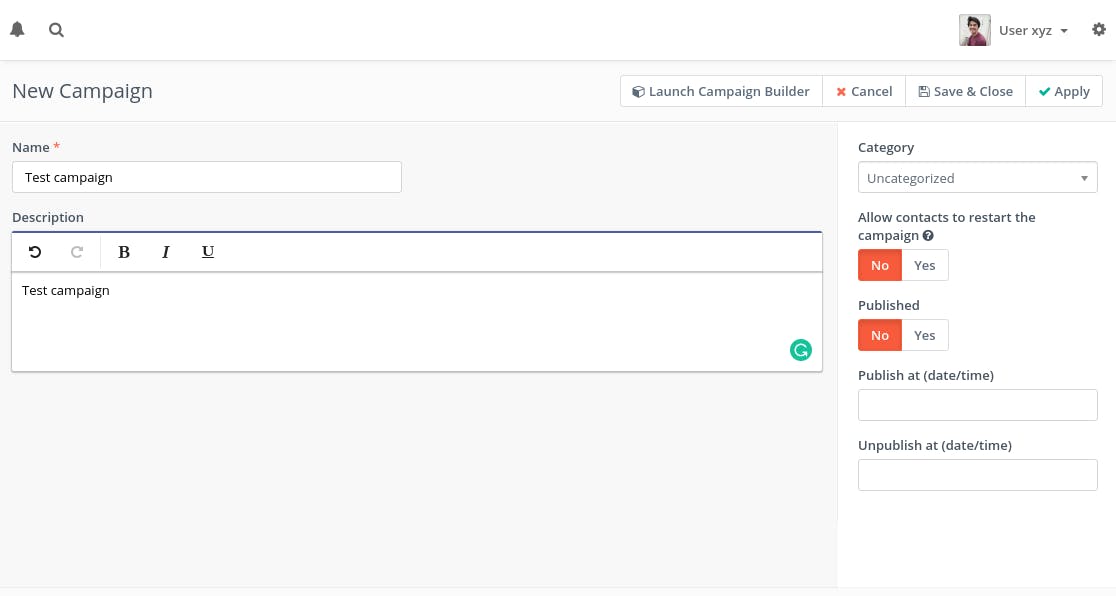
- Click on [Launch campaign builder]
- In contact source select [Contact Segments]
- A popup will open named Contact Source in it select the segment you want to apply and click on add
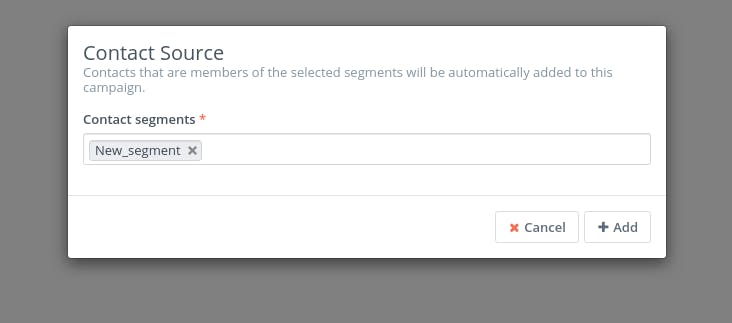
- Click on [Apply]->[Save & Close]
- After this, you will see a square block with the name of the segment on it
- Click on the grey semicircle and you will be able to see some options as shown in the image
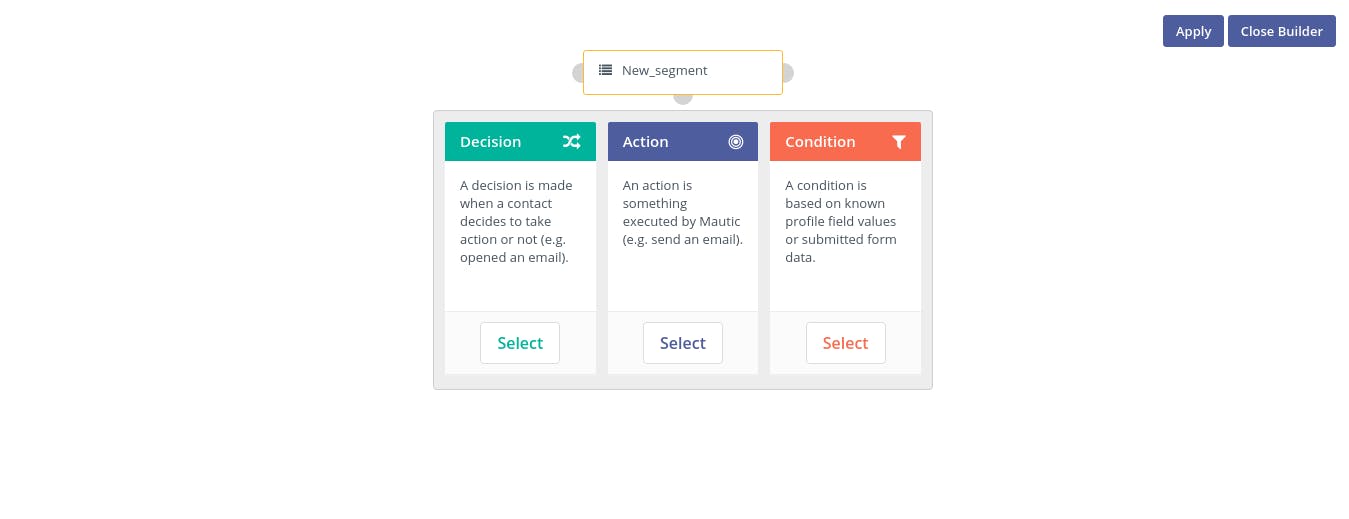
- Click on the select button inside the Action section and select Send Email from the dropdown which will appear once you click on select.
- A popup will open named Send Email.
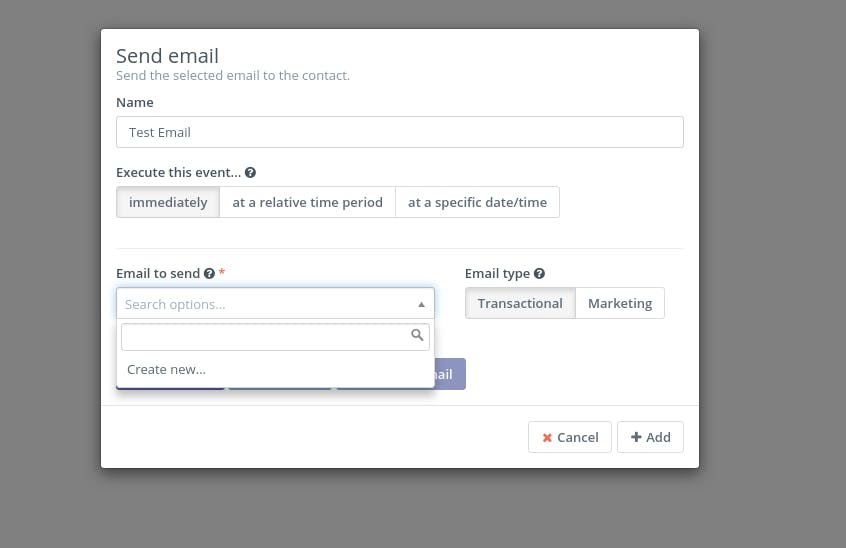
- Set the Email name
- Inside Email to send click on the Create new dropdown
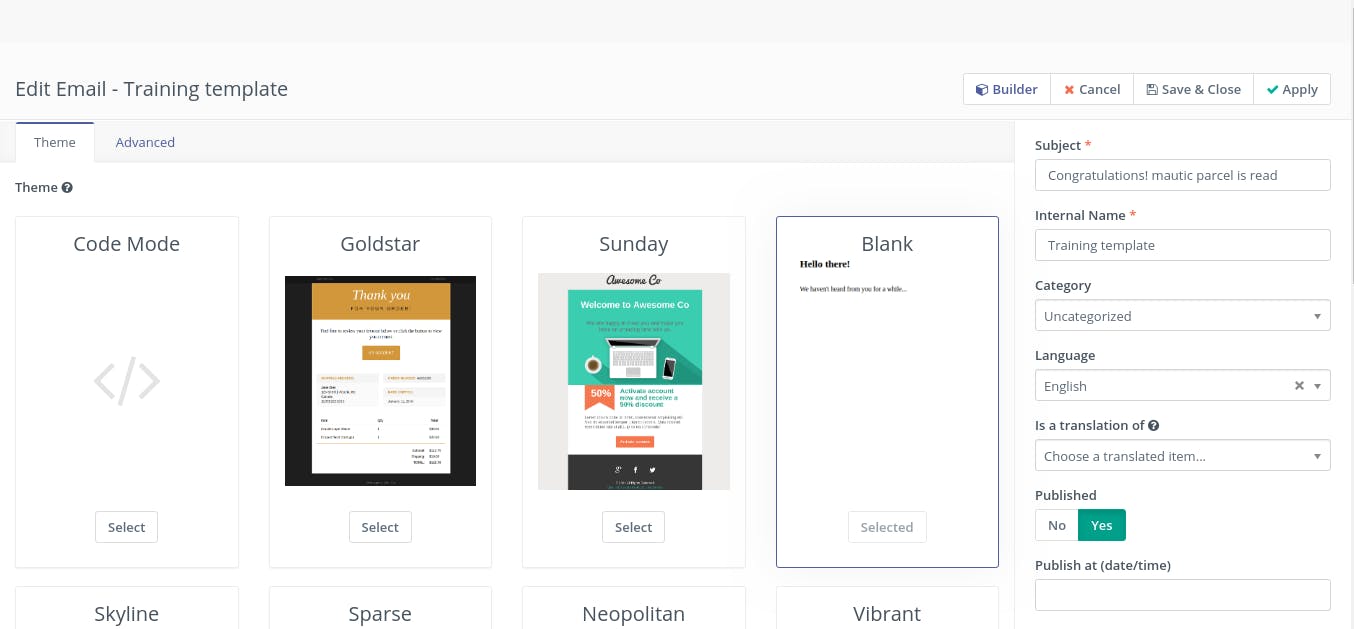
- A popup will open with a number of email templates that you can use to send the email.
- For now, you can select the Blank template option.
- Enter some basic credentials like Subject, Internal name.
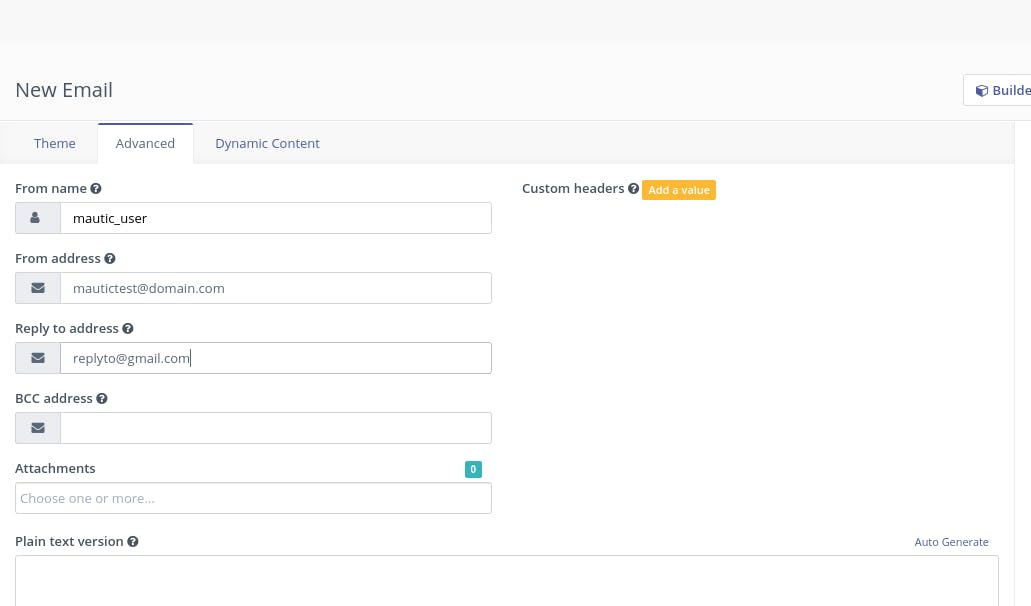
- Click on the Advanced tab (These are optional and are used when you want to send emails with credentials different than the default ones)
- Enter From-name
- Enter From-address as your valid from address is with a valid domain name
- Enter Reply-to address
- Click on Builder button to open builder, a new window will open
- Create your email body as per your requirements
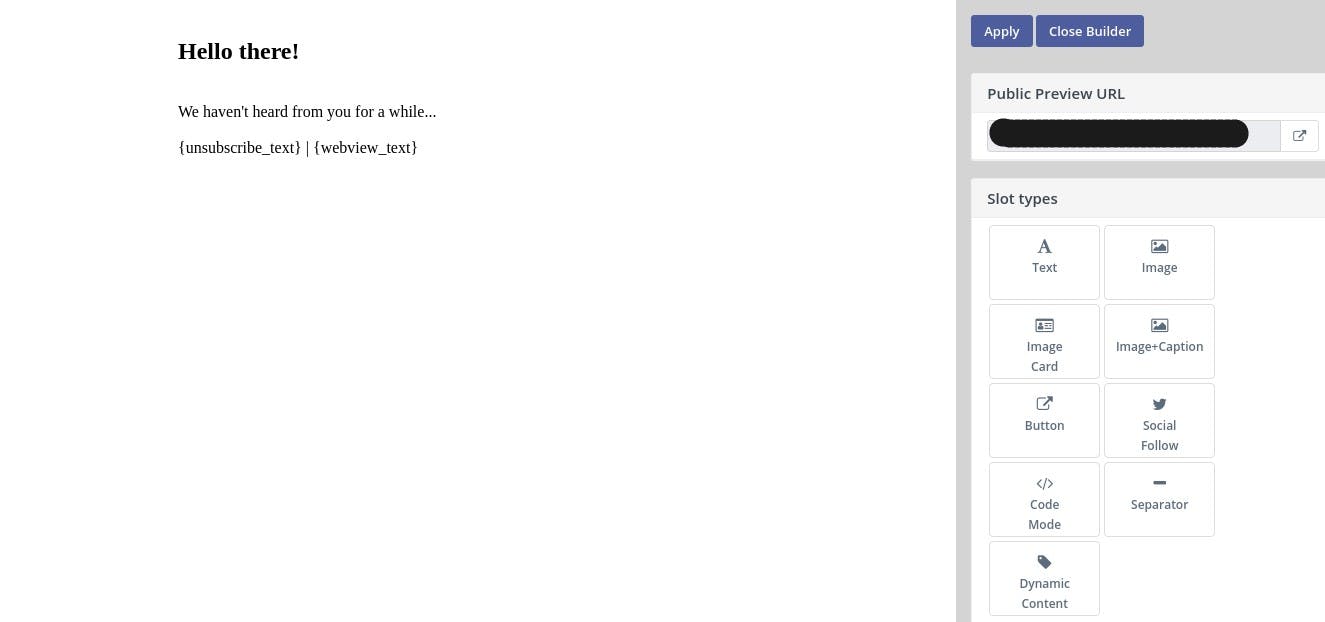
- Click on [Apply] -> [Save & Close] and close the window
- Set email type according to your needs
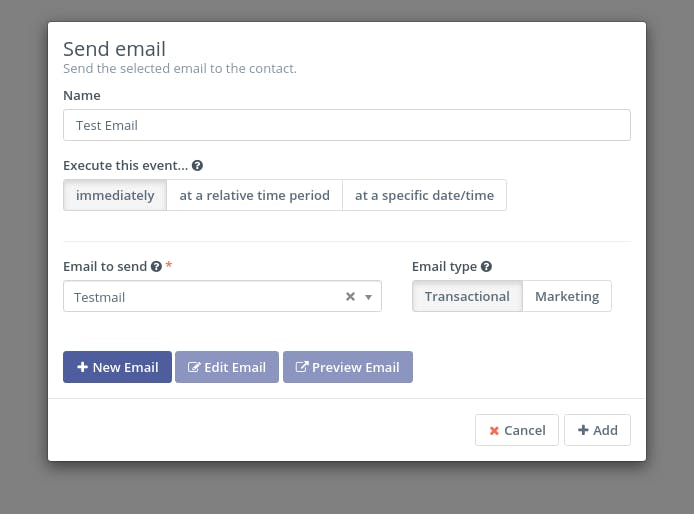
- Click on add. The panel will close and you will be able to see the email flow in a relational diagram.

- Click on [Apply] -> [Close Builder]
- In the Edit Campaign panel set published to Yes
- Click on [Apply] -> [Save & Close]
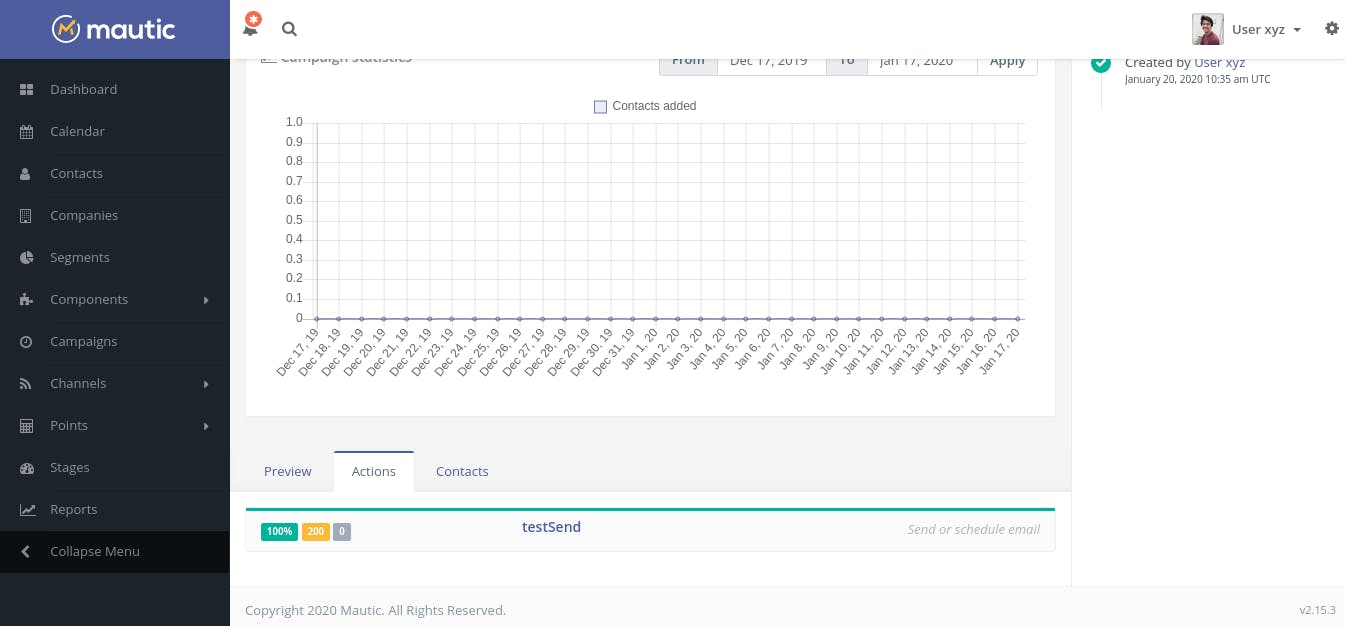
This will open the Campaign panel in which all the campaign status is represented in a graphical format in which you can track the emails that are being sent.
With this, your campaign is ready to send emails from your imported segment.
After some time as the Cron runs, you will be able to see the emails being populated in the dashboard.
You can check the progress of your campaign in the campaign panel.
Conclusion
By following the above-mentioned steps you are now ready to send emails through the Mautic platform. You are now able to upload an email list, create an email body, filter the email leads with segments and send emails using the Pepipost SMTP server.
Grade My Email
Check your spam now?
Netcorecloud's toolkit is the solution to all your email problems.


You can also explore
Netcore connects & unifies your data across all sources, connects to your marketing channels and provides you with control over AI Powered automation and personalization.


Deploy emails that are
screenshot worthy!

Unlock the Secrets of Your Domain, Discover Limitless Possibilities! ✨
Get a Free Domain Health Check Now!
Hitesh Pandey💻
Full Stack Developer, Pepipost
🥑 Developer Evangelist | 🥇Email Geek